Installing Spotlight Cam Plus and Pro
Learn how to install your Spotlight Cam Plus or Pro battery, battery with solar, or plug-in.
Installation manuals for Spotlight Cam Plus and Pro
View the manual for Spotlight Cam Plus Battery. View the manual for Spotlight Cam Plus Plug-In (US English, French, and Spanish). View the manual for Spotlight Cam Pro Battery. View the manual for Spotlight Cam Pro Plug-In.Hardware included
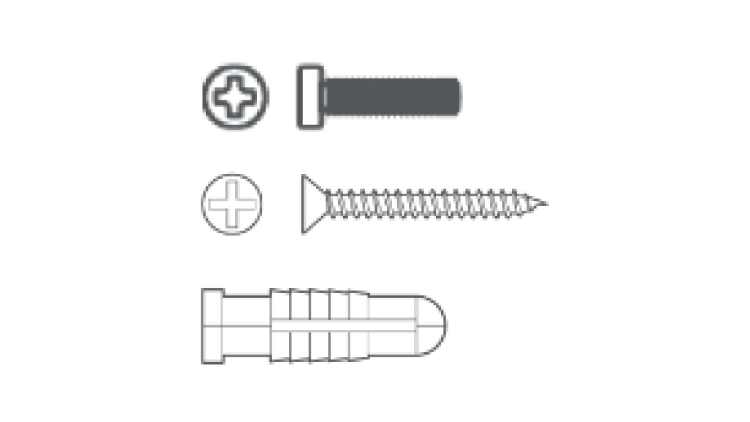
- Mounting screws
- Mounting anchors
- Security screw
- Cable Clips (Plug-in and Solar)
Tools required
- Phillips head screwdriver
- Drill with 6mm drill bit (optional)
Installing your camera with hardwiring or Dual Power mode
- You can combine battery and plug-in power options to
- If you are setting up a Spotlight Cam Plus or ProWired, or have purchased aHardwiring Kitseparately,
Step 1: For battery or solar devices, charge the battery
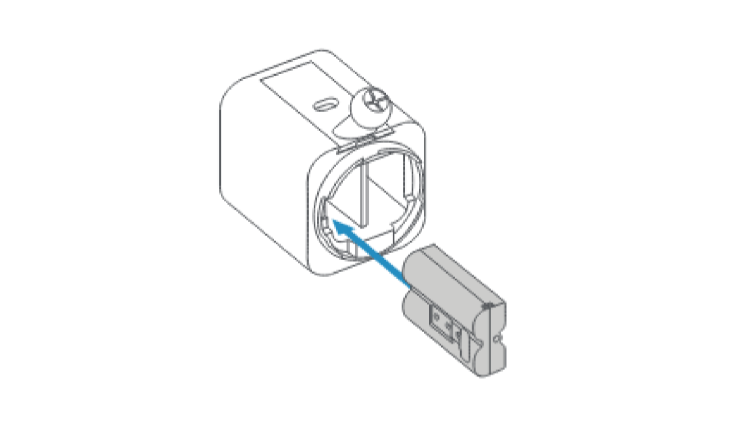
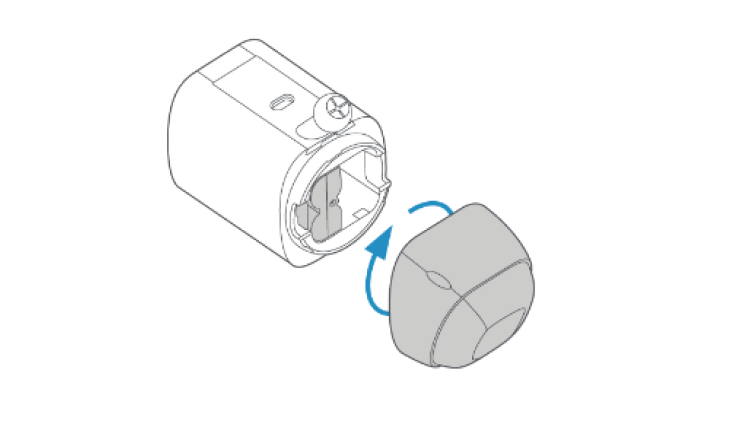
1. Twist the battery compartment counterclockwise to unlock and remove the cover.
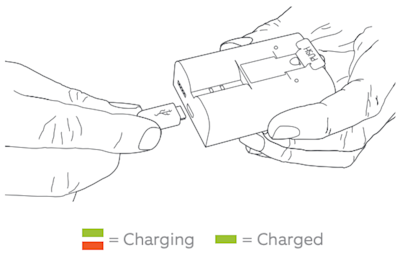
2. Remove and charge the battery. Connect the charging cable to the battery's charging port. While charging, your battery displays two colored lights, a solid green and an amber light. Charge the battery until only the green light remains lit. Learn more about charging the battery on your security camera.
3. Slide the battery back into the camera until it clicks into place.
4. Replace the battery compartment cover and twist clockwise to lock it. Then, tighten the security screw.
Step 2: Complete setup in the Ring app
- Bring the camera close to your wifi source. If setting up Spotlight Cam Plug-In, temporarily plug it in near your router.
- and connect it to your network.
Step 3: Select a location for your device
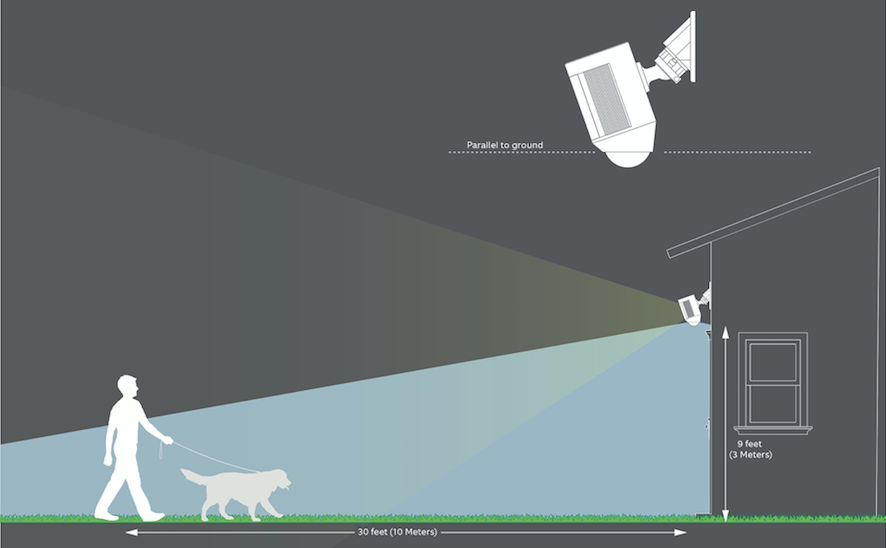
We recommend mounting your camera 8 to 10 feet (2.5 to 3 meters) from the ground for optimal motion detection. Learn more about positioning your camera for optimal performance.
Step 4: Choose your mounting plate orientation
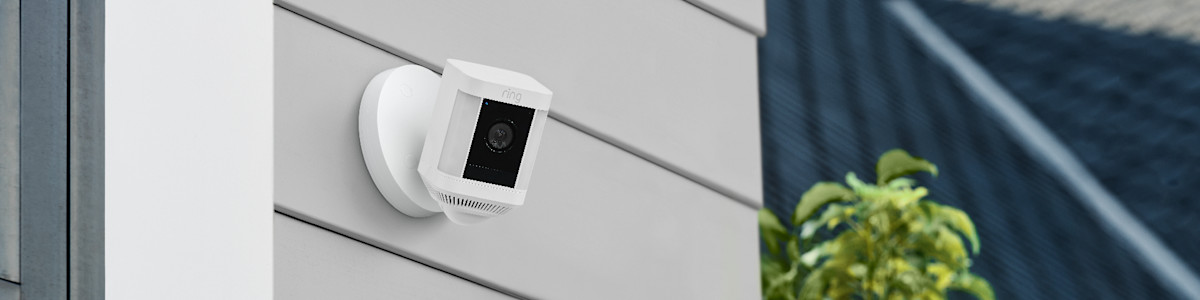
Your camera can be mounted on a wall, eave, or overhang using the adjustable mounting plate. Keep the rubber seal on the base to make sure it stays securely fastened.
If installing on a wall:
Your camera comes ready to mount, with the ball joint pointing down. No adjustments are needed.
If installing on an eave or overhang:
- Remove the battery cover by twisting it counter-clockwise.
- Insert the ball joint plate with the ball joint pointing up.
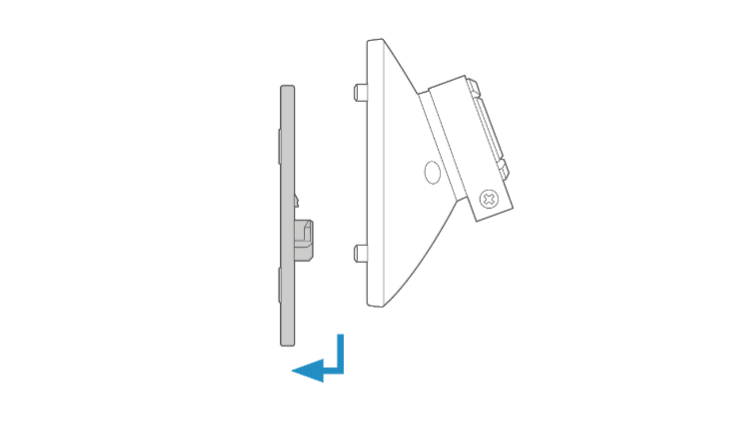
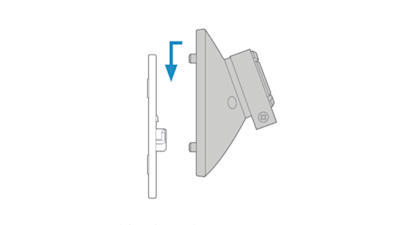
Step 5: Remove the mounting plate from the camera mount
Slide the mounting plate down, and gently pull it away from the camera mount.
Step 6: Install the mounting plate
WARNING! Only use the included mounting screws when securing the mounting plate.
CAUTION! DO NOT drill into your home’s electrical wiring.
Choosing mounting plate direction
- If installing on a wall:Place the plate with the UP arrow pointing up.
- If installing on an eave or overhang:Place the plate with the UP arrow pointing toward the area you wish to view.
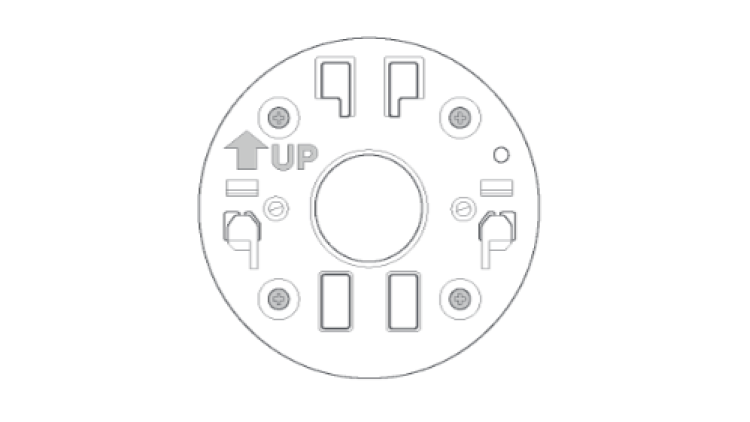
Fastening the screws
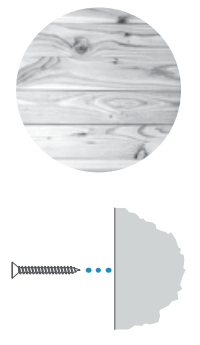
If installing on a wood surface: Screw the plate directly into the wall.
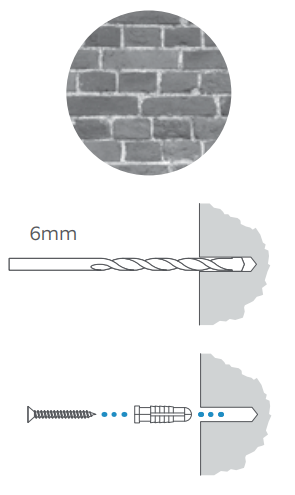
If installing on a masonry (concrete, brick, or stucco) surface:
- Mark four screw holes using the plate as a guide.
- Drill pilot holes using a 0.25 in (6 mm) drill bit.
- Insert the included wall anchors, then drive the four mounting screws through the mounting plate into the wall anchors.
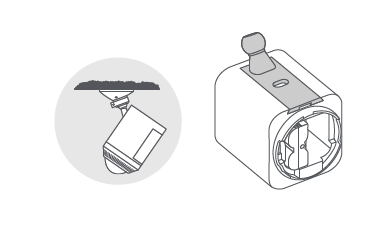
Step 7: Attach the camera mount to the mounting plate
Slide the camera mount down onto the mounting plate, then tighten the security screw.
 |  |
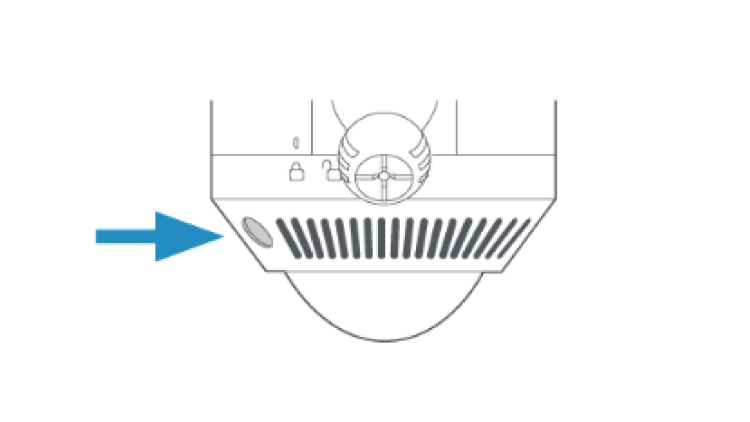
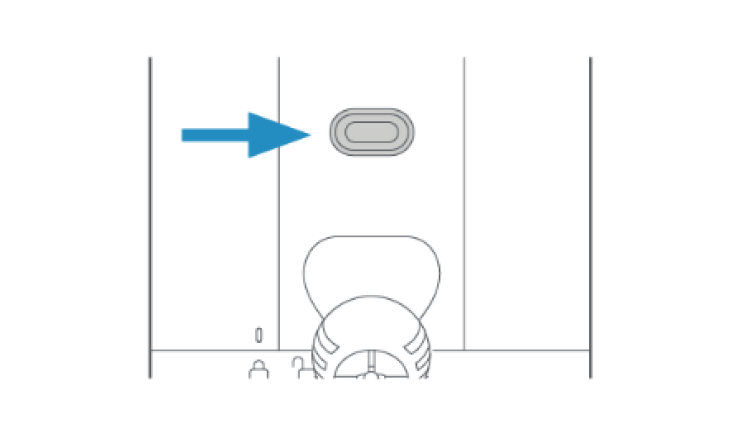
Step 8: Tighten the battery compartment security screw
Tighten the security screw on the bottom of your camera to secure the battery compartment, even if you are not using a battery.
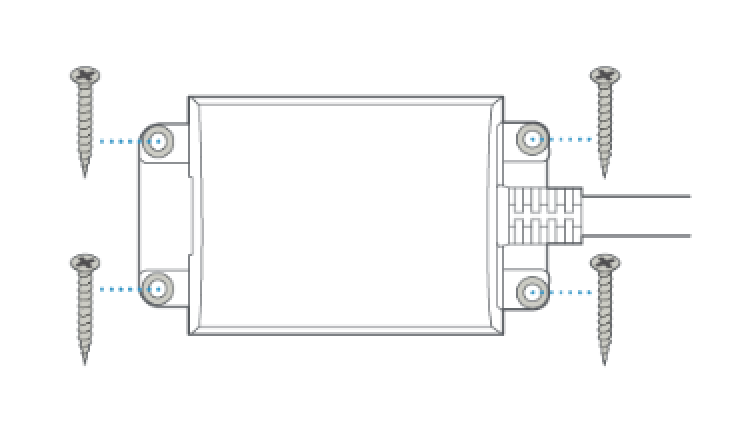
Step 9: Connect any external power sources
You can use a Solar Panel, Hardwiring Kit, or Plug-In Adapter to power your device.
- If you are connecting a solar panel:before connecting it to the back of the Spotlight Cam Plus or Pro.
- If you are using a Plug-In Adapter or Hardwiring Kit: Connect the USB-C cable to the back of the device.
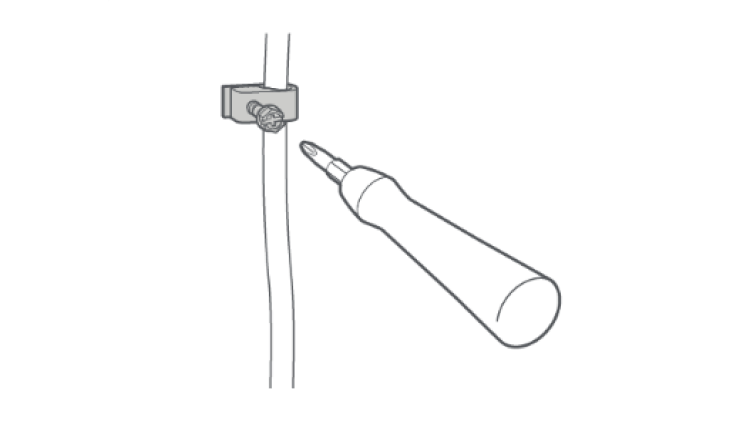
Step 10: Secure any cables and adapters
Use provided cable clips to secure any cables to your wall. Use a 0.25 in (6 mm) drill bit to pre-drill holes in the wall and insert the provided anchors first if installing on a masonry surface, like stucco or brick.
If using a plug-in adapter, you can secure the power adapter to the wall with the included mounting screws.
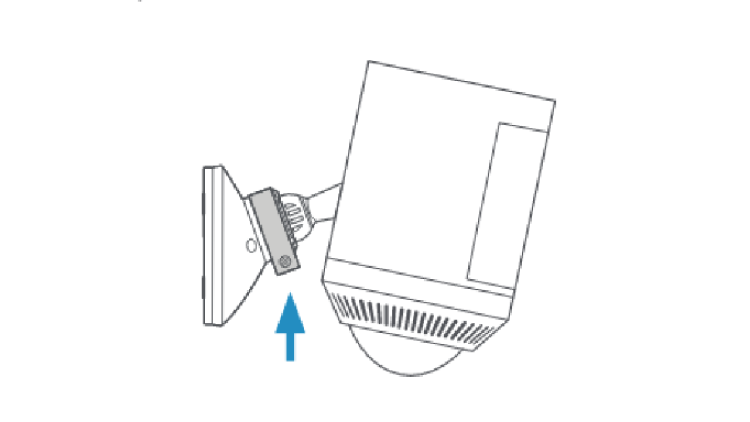
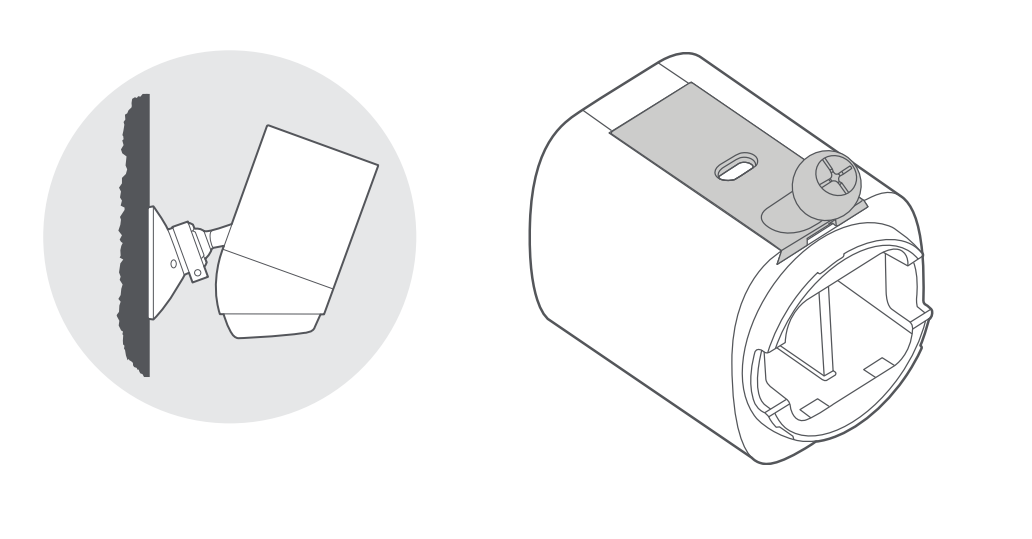
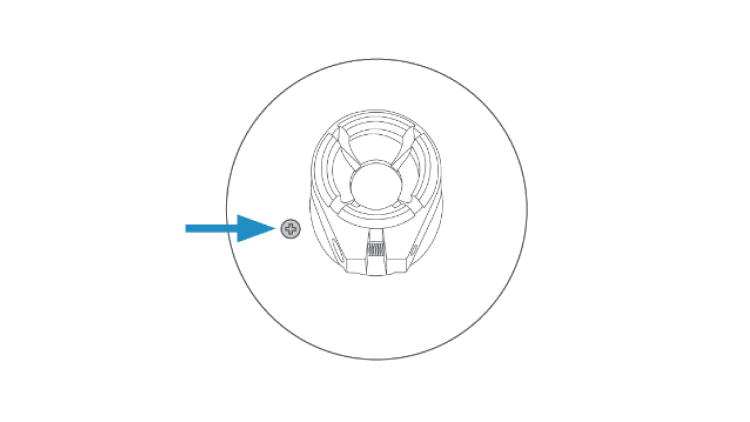
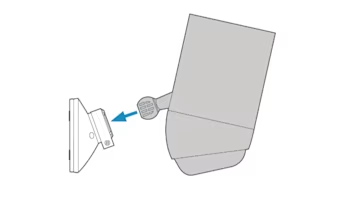
Step 11: Attach the Spotlight Cam Plus or Pro to the mount
Loosen the metal collar on the camera mount using a Phillips-head screwdriver (not included). Push the ball joint into the socket until it snaps into place.
Step 12: Adjust the camera angle
You can rotate the camera to adjust the field of view.
- Remove the protective film from the device to allow motion detection and proper view.
- Use the Live View feature in the Ring app to make sure the camera is monitoring the desired area. Rotate the camera to adjust the view accordingly.
- Insert and tighten the screw on the metal collar to fix the Spotlight Cam Plus or Pro at your preferred angle.