Installing Solar Charger for battery-powered doorbells
This article provides step-by-step instructions to install your Solar Charger for Ring battery doorbells.
Installation manuals
View the manual for Solar Chargers for doorbells with a removable battery.
View the manual for Solar Chargers for doorbells with a built-in battery.
Step 1: Removing the doorbell
Uninstall any existing doorbell before installing the Solar Charger. Make sure you have the correct Solar Charger for your doorbell model.
For doorbells with a removable battery:
- Remove the security screw.
- Remove the faceplate.
- Remove the mounting screws.
For doorbells with a built-in battery:
- Remove the security screws.
- Remove the doorbell from the mounting plate.
- Remove the mounting screws.
- Remove the mounting bracket.
Step 2: Preparing the mounting surface
Warning: Only use the included mounting screws when securing the doorbell or Solar Charger to the wall, and avoid positions that have electrical wiring behind the plate. Do not drill into your home's electrical wiring.
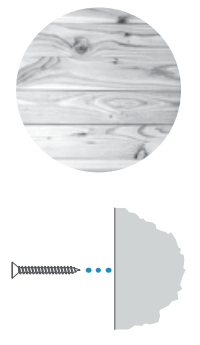
Installing on a wood surface
Screw the Solar Charger directly into the wall.
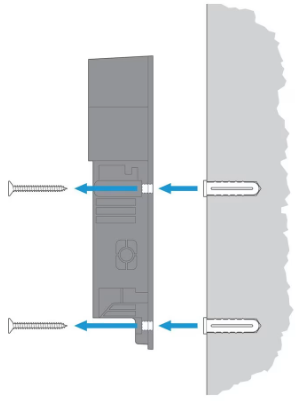
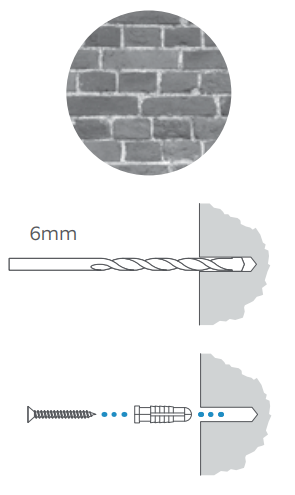
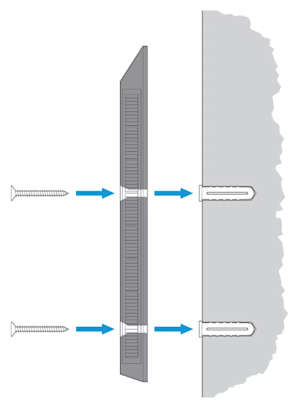
Installing on a masonry (concrete, brick, or stucco) surface
- Mark four screw holes using the plate as a guide.
- Drill pilot holes using a 0.24 in (6 mm) drill bit.
- Insert the included wall anchors, then drive the four mounting screws through the Solar Charger into the wall anchors.
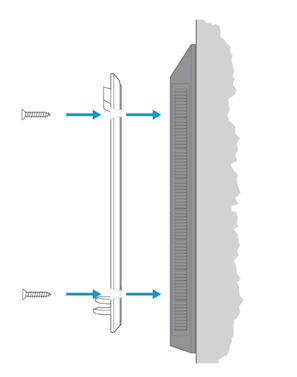
Step 3: Mounting the Solar Charger
Screw your Ring Solar Charger onto the wall or into the wall anchors. Then, install any Wedge Kits, Corner Kits, or mounting brackets onto the Solar Charger.
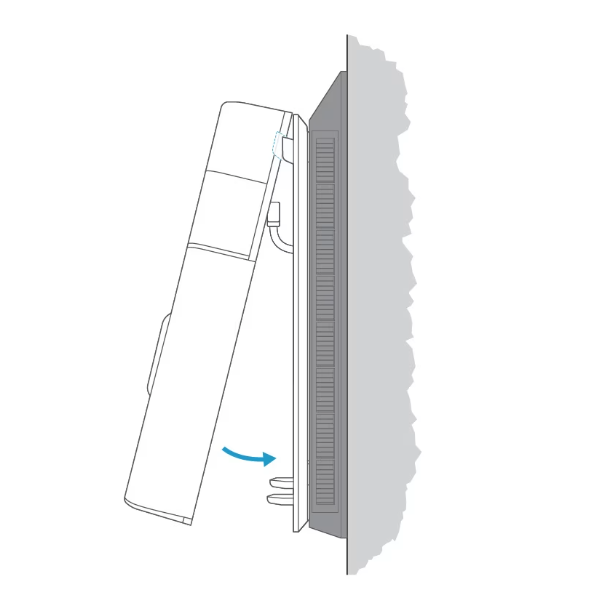
Step 4: Connecting the doorbell to the Solar Charger
For doorbells with a removable battery:
- Loosen the screw terminals on the back of your doorbell.
- Insert the Solar Charger wire connector withUPside facing forward.
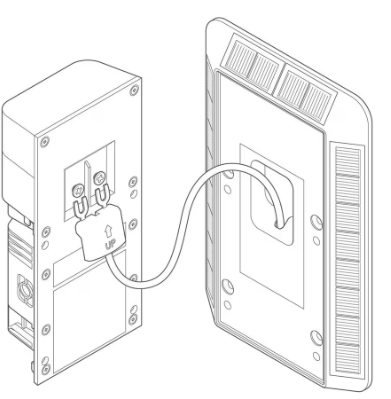
- Tighten the terminal screws.
- Fit your doorbell into the Solar Charger and secure with screws.
- Tuck the retractable wire into the Solar Charger.
- Attach the faceplate.
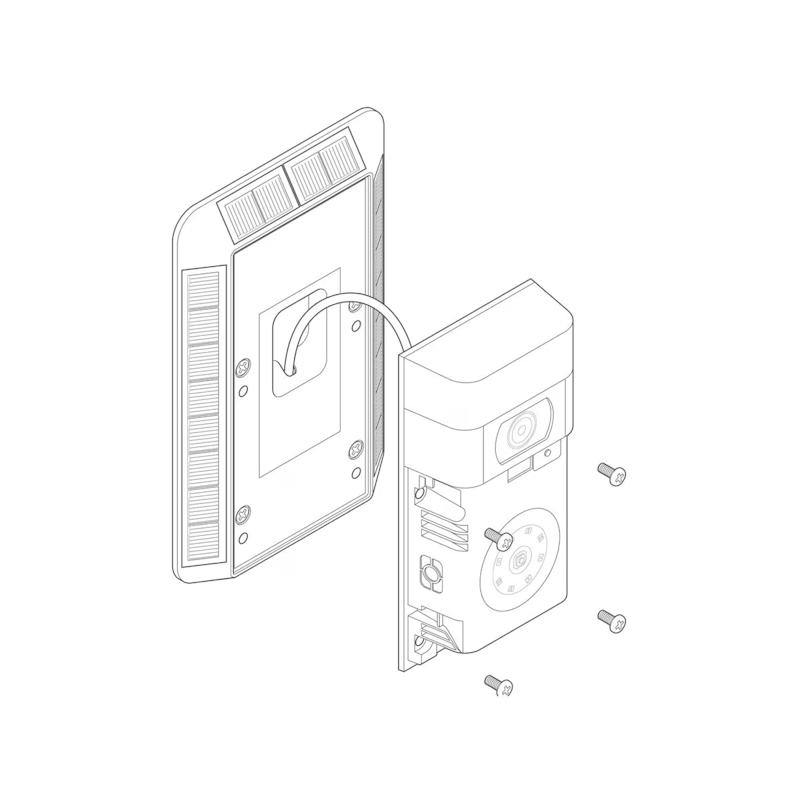
For doorbells with a built-in battery:
- Secure the mounting bracket to the Solar Charger with screws.
- Connect the micro USB cable to your doorbell’s charging port.
3. Mount your doorbell to the bracket and tuck the wire into the Solar Charger.
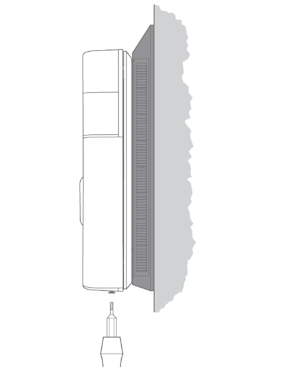
Step 5: Securing the doorbell to the Solar Charger
Finish your installation by installing the security screw at the bottom of the device.