
Installing Floodlight Cam Wired Plus and Pro
View and download the manual for Floodlight Cam Wired Plus.
View and download the manual for Floodlight Cam Wired Pro.
Requirements for installing Floodlight Cam Wired Plus and Pro
- Floodlight Cam Wired Plus and Pro must be installed on a 4 in (10 cm) round UL listed weatherproof electrical box.
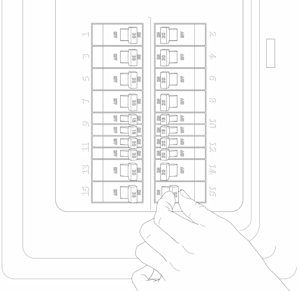
- Make sure the power is turned off at the circuit breaker before beginning installation.
Step 1: Prepare your Floodlight Cam Wired Plus or Pro for installation
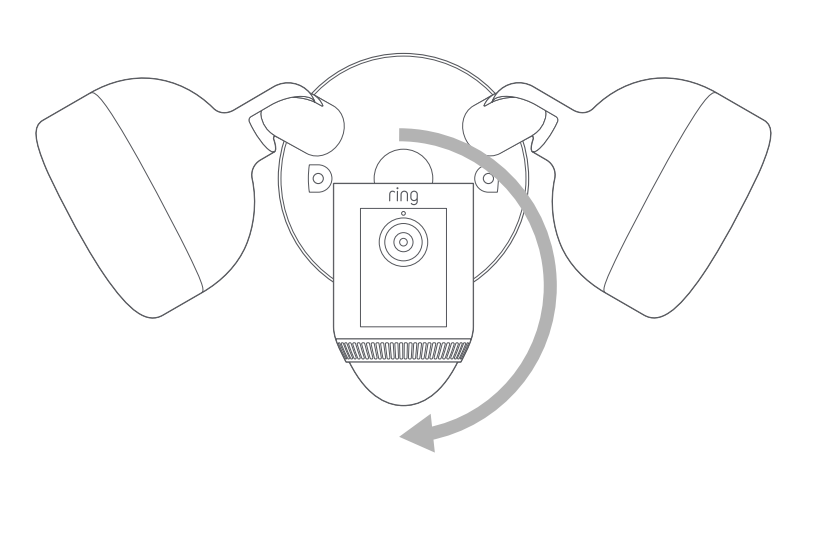
Rotate both the lights outward if you are mounting the Floodlight Cam Wired Plus or Pro on an eave or overhang.

If you are mounting to a wall, rotate the camera downward into the installation position.
Step 2: Remove your existing floodlight (if applicable)
With the power off at the circuit breaker, remove your existing floodlight at the junction box and disconnect the wires.
If there is a metal bracket attached to the junction box, remove that as well.

Step 3: Choose your screws
Select a set of screws that fit your junction box from the bags marked A through F. Save a screw from either bag B or C for one of the following steps.
- Bag A - standard screws that fit most junction boxes
- Bag B & C - longer screws for recessed junction boxes
- Bag D, E & F - best for older boxes with smaller screw holes
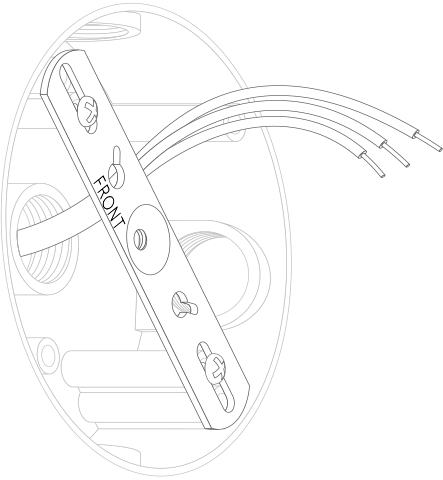
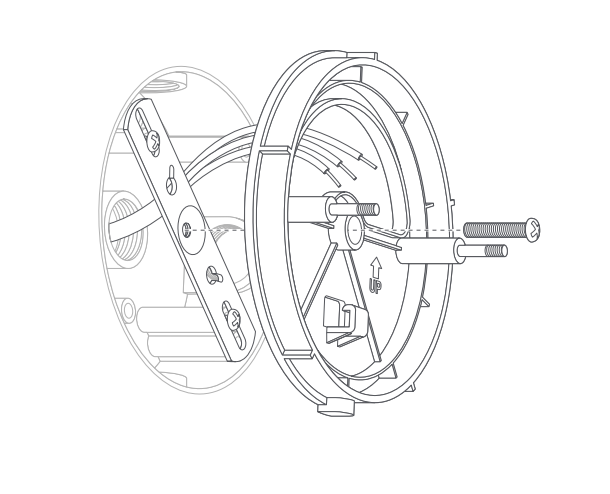
Step 4: Attach the metal mounting bracket
Attach the included metal mounting bracket with the selected screws. Be sure to align the bracket so that the “FRONT” text faces outwards.
Step 5: Install the plastic mounting plate
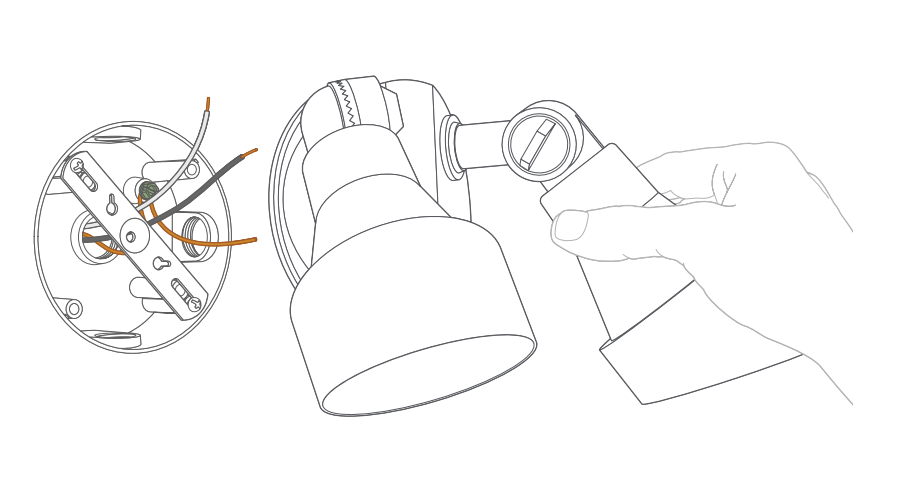
- Align the plastic mounting plate with the junction box, and feed the power wires through the opening.Note:If attached to the camera, pull gently to release the plastic mounting plate from the device.
- If you are installing the camera on a wall, feed the wires through the mounting plate with the UP arrow pointing up.
- If you are installing the camera under an eave, feed the wires through the mounting plate with the UP arrow pointing toward the wall.
2. Insert one of the longer screws from Bag B or C into the center hole, then tighten to secure.
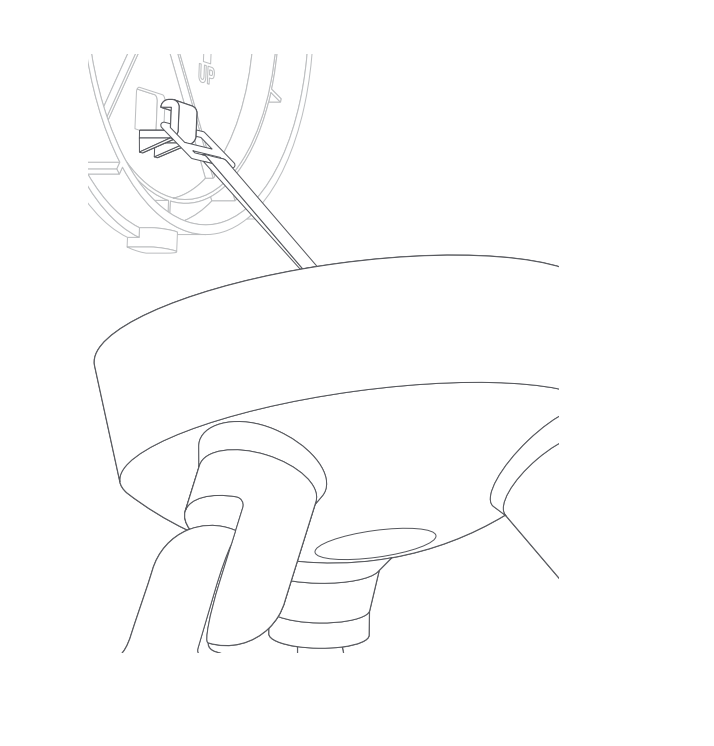
Step 6: Mount your Floodlight Cam Wired Plus or Pro
- Locate the nylon strap on the back of the light fixture and loop the buckle at the end over the hook on the mounting plate.
- Make sure that the buckle and hook are secure before releasing the light fixture.
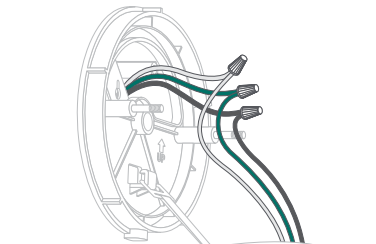
Step 7: Connect the wires
WARNING: Use caution when handling electrical wiring. If you cannot easily identify the wires coming out of your junction box, consult a licensed electrician.
- With the power still turned off at the breaker, use a wire nut from the bag marked G to connect the ground wire coming from the junction box to the green ground wire on the Floodlight Cam.
- Use another wire nut from the bag marked G to connect the neutral wire coming from the junction box to the white neutral wire on the Floodlight Cam.
- Use another wire nut from the bag marked G to connect the hotwire coming from the junction box to the black hot wire on the Floodlight Cam.
- Give all three wires a gentle tug to make sure they are secure.
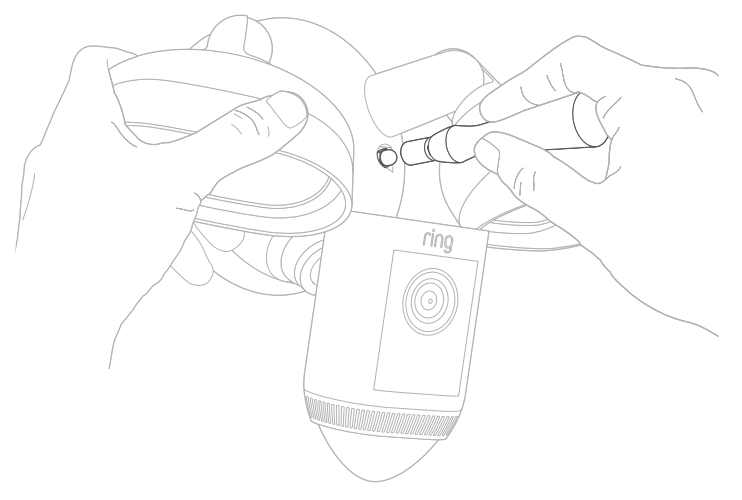
Step 8: Mount the fixture
- Tuck the wires into the junction box, then align the two holes on the light fixture with the threaded posts on the plastic mounting plate. Slide the light fixture onto the posts and push firmly into place.
- Secure the fixture using two of the hex cap nuts from Bag G over the ends of the threaded posts.
- Remove the reversible bit from the included screwdriver and use the handle to tighten the hex cap nuts.
- After you install your Floodlight Cam Wired Plus or Pro, you can choose to add extra protection against weather by applying weatherproof silicone caulk or sealant where the camera meets the junction box. This sealant isn't included with your Floodlight Cam.
Step 9: Restore the power at the breaker
- Now that your Floodlight Cam Wired Pro is installed, you can turn the power back on at the breaker.
- The lamps on your Floodlight Cam Wired Pro will flash once it’s powered on.
Complete setup in the Ring app
Once your Floodlight Cam Wired Pro is installed, follow the setup instructions in the Ring app.