
Installing Your Wired Doorbell Pro
Install your Wired Doorbell Pro with these step-by-step instructions.
Bag A
- (2) 1-3/8" long mounting screws
- (2) wall anchors
Bag B
- (2) 3/16" security screws
Bag C
- (2) 5/8" Short mounting screws
Bag D
- (2) Wire nuts
- (2) Wire extenders
- (1) Pro Power Kit Cable
Step One - Find your doorbell chime
Your Wired Doorbell Pro is designed to replace an existing doorbell button and gets its power from the doorbell system. Ring your existing doorbell and listen for the chime. If it rings, you know your existing doorbell system is working.
Follow the sound to find your chime and make a mental note of the location. We'll return to your chime soon.
Note: Don't have an existing doorbell? You can power your Wired Doorbell Pro directly using our Plug-in Adapter. Learn more about Ring Plug-In Adapter.
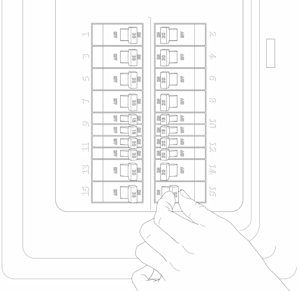
Step Two - Turn off power at the breaker
WARNING: Electrical shock hazard. Disconnect power to installation area at your circuit breaker or fuse box before beginning installation. Always use caution when handling electrical wiring.
Installation by a qualified electrician may be required in your area. Refer to your local laws and building codes before performing electrical work; permits plus professional installation may be required by law.
This is essential to keeping you and your new Ring video doorbell safe. If you're not sure which breaker controls your doorbell chime, turn off the master breaker for your home or contact an electrician.
Note: CAUTION! You'll be working with electrical wires during the install process. If you are uncomfortable or inexperienced in doing so, consult with a qualified electrician.
Step Three - Grab the included Pro Power Kit
The Pro Power Kit ensures that your Ring video doorbell gets the power it needs and must be installed before you install your video doorbell.
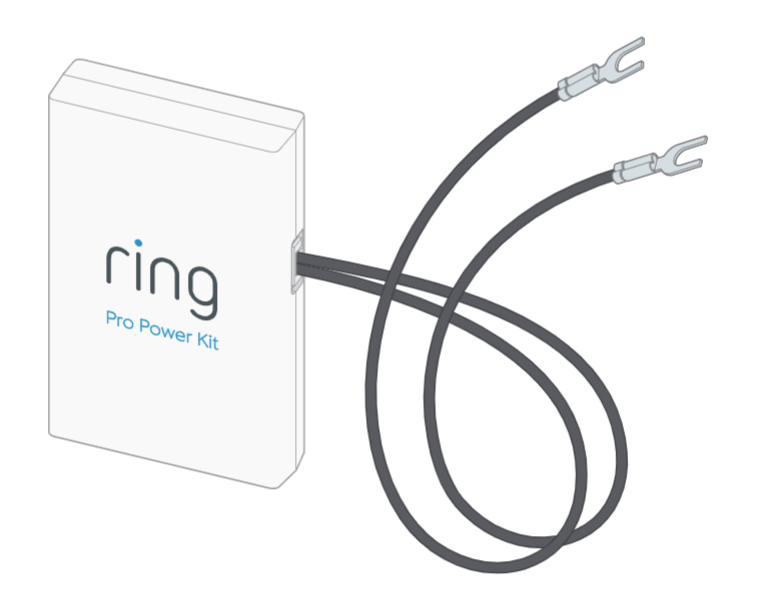
Your Ring video doorbell is compatible with doorbell systems supplying 16-24 volts VAC at 50 or 60Hz, 40 VA max, The AC connector is a Class 2 energy source.
Note: If you already have an existing Pro Power Kit installed, you must remove it and use the new one included with your new doorbell.
Step Four - Remove the cover from your doorbell chime
After you've located your doorbell chime and turned off the power at the breaker, remove the cover from your chime and set it aside for now.
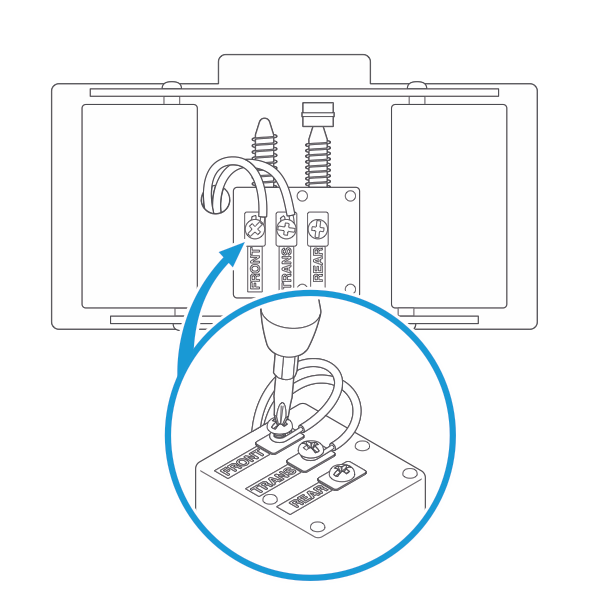
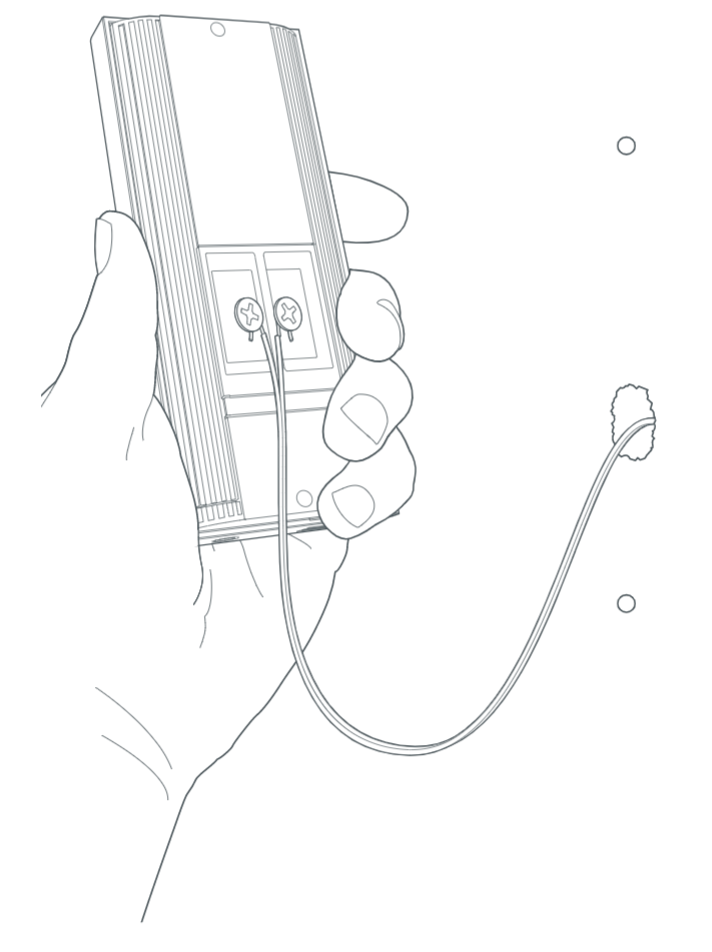
Step Five - Loosen the "Front" and "Trans" terminal screws
Make sure to keep the existing doorbell wires in place.
Step Six - Connect the Pro Power Kit wires
Connect one wire from the Pro Power Kit to the "Front" terminal and the other to the "Trans" terminal. It doesn't matter which wire you connect to which terminal.
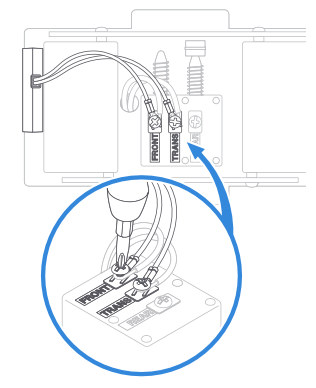
Then re-tighten the terminal screws.
View wiring diagrams for wired doorbell setup
Step Seven - Position the Pro Power Kit and replace the cover
Place it within your internal doorbell, away from any moving parts.
Step Eight - Uninstall your existing doorbell button
Remove your doorbell from the wall. Disconnect the wires. Make sure they don't fall back inside your wall so you can access them later.
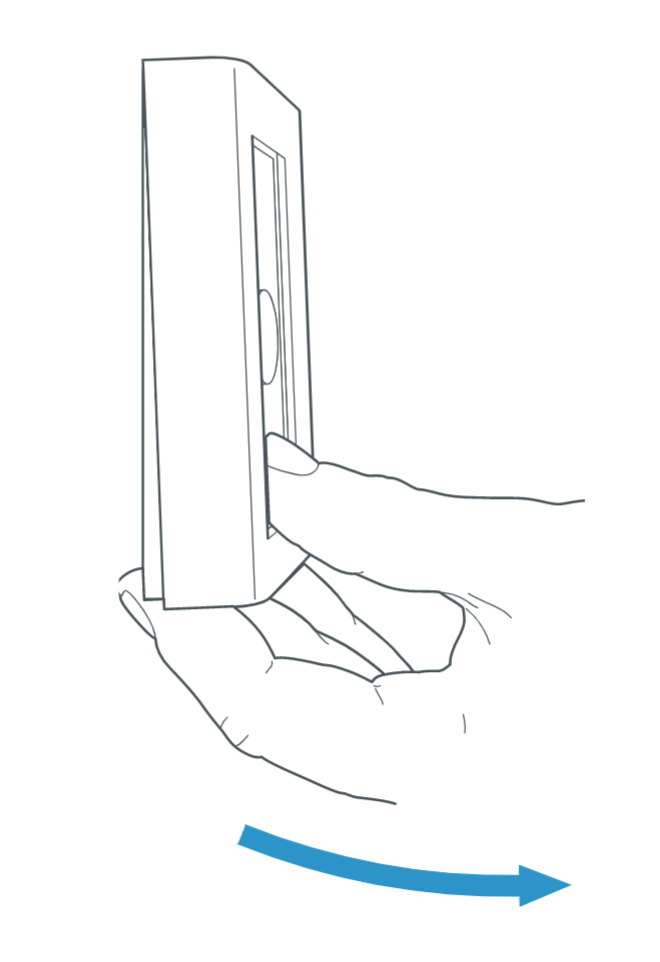
Step Nine - Remove the faceplate
Gently pull the faceplate off the unit by pulling it from the lower edge of the plate.
Note: The faceplate should pop off easily, do not use excessive force.
Step Ten - Mark the screw holes
Using your Ring video doorbell as a template, mark the location of the two mounting holes on the wall. For optimal performance, mount your doorbell 48 inches from the ground.
Step Eleven - Install the anchors (optional)
On stucco, brick, or concrete, use a 1/4" (6mm) masonry bit to drill holes in your wall, then insert the included wall anchors.
Note: If you're installing on wood or siding, you can skip this step.
Step Twelve - Connect the doorbell wires
Loop one doorbell wire around each of the screw terminals on the rear of your Ring video doorbell the tighten the terminals to secure.
If your doorbell wires are too short to reach your new Ring video doorbell, you can attach the included wire extenders using the included wire nuts
Step Thirteen - Screw in your Ring video doorbell
Mount your Ring video doorbell with the two included mounting screws. If you ran the wire through your wall, be sure to feed any excess wiring into the wall first.
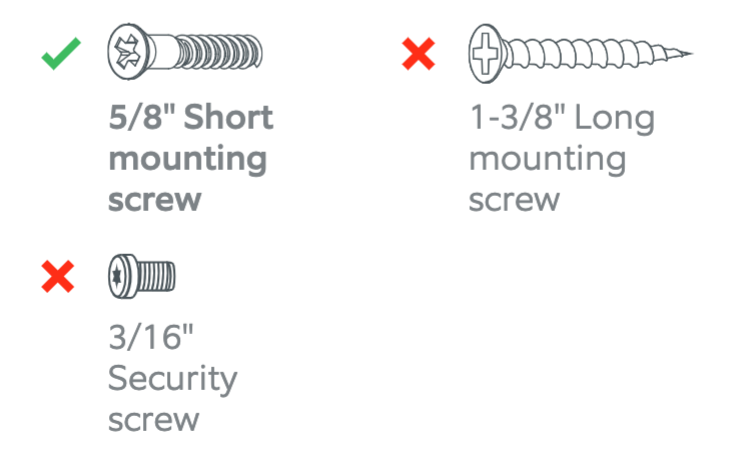
Note: DO NOT USE any screw other than the included mounting screw when securing your Ring video doorbell.
Step Fourteen - Restore power at the breaker
It may take a moment for your Ring video doorbell to power on. You'll know it's ready when it lights up and speaks to you.
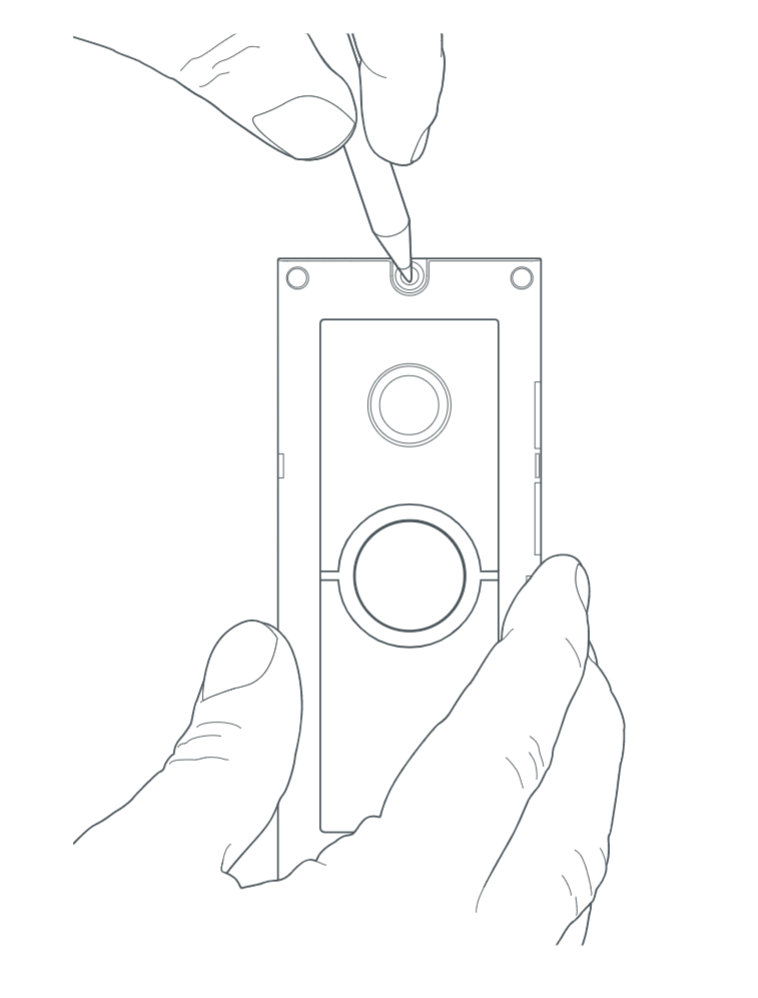
Step Fifteen - Secure your Ring video doorbell
Re-attach the faceplate, then use the included screwdriver to drive the small security screw into the bottom of your Ring video doorbell.
Note: CAUTION! - If you use the wrong screws to secure the Ring Wired Doorbell Pro, you could damage the device, create a fire hazard, and be seriously injured.
Download the user manual for Wired Doorbell Pro (formerly Video Doorbell Pro 2).