
Installing your Hardwired Kit for Spotlight Cam (1st Gen), Wired
Learn how to install your Hardwired Kit and hardwire your Spotlight Cam (1st Gen), Wired.
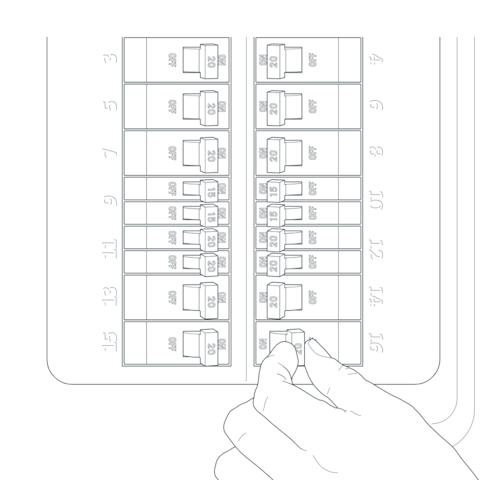
Shut off power to the breaker.
If you don’t know where your breaker is or how to turn off power to the electrical box, consult with a licensed electrician.
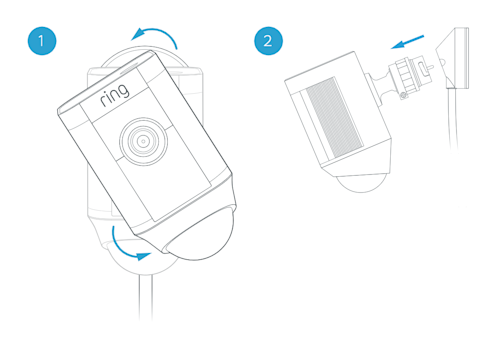
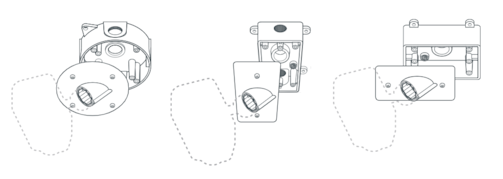
Remove your Spotlight Cam from its base.
While holding the mounting base, turn Spotlight Cam to the left to disengage it and set the camera aside for now.
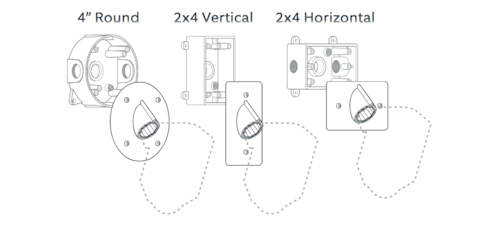
- When mounting to a vertical wall, you’ll usually want the mounting pro to face downwards.
- If mounting to a horizontal surface, face the port in the direction you want the camera to view.
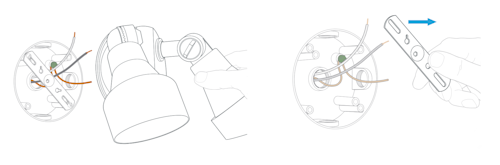
Remove your existing light or camera (if applicable).
With power off at the breaker, remove your existing light or camera from the electrical box and disconnect the wires. If there is a bracket attached to your electrical box, remove that as well.
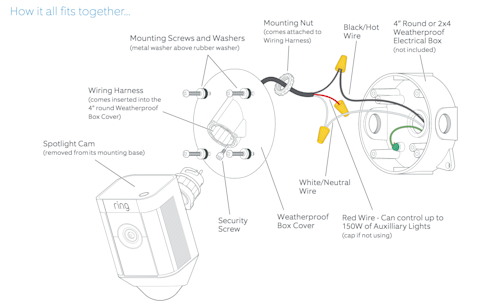
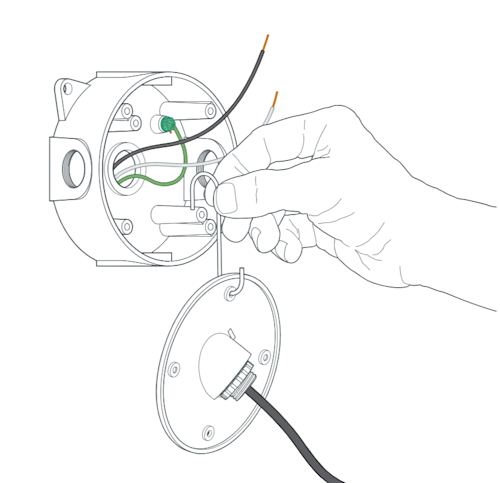
Hang the box cover.
Inspect the box to make sure it’s sealed tightly so water can’t get in. Then use the included hanging hook to hold the weatherproof box cover in place as you wire it in.
Connect the power wires.
Connect the black and white wires on the wiring harness to the black (hot) and white (neutral) wires coming out of your electrical box.
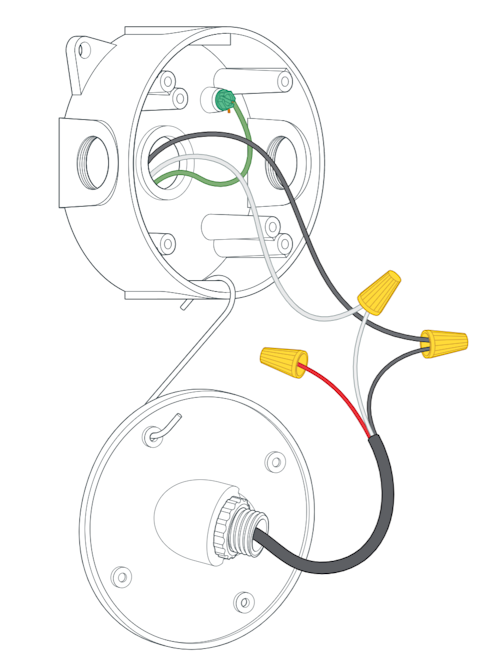
- Use the included wire nuts to secure and protect the connections.
- The red wire is optional and should only be connected if you wish to control other lights with your Spotlight Cam Wired.
Note: If you don’t have clearly colored black and white wires coming out of your electrical box, consult with a licensed electrician.
Auxiliary light control (optional)
Your Spotlight Cam Wired has an advanced motion detection system. If you’d like other lights (such as floodlights) use the red wire to wire it to the auxiliary light fixtures in accordance with this diagram:
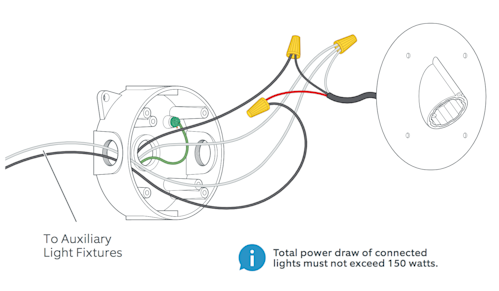
Your connected lights also turn on when you manually enable your Spotlight Cam Wired lights in the Ring app.
Note: Total power draw must not exceed 150 watts.
Screw in the box cover.
Be sure to add a metal washer, then a rubber washer to each screw before inserting.
Use the included screws to secure the box cover to the electrical box.
Note: Some round boxes may only take two screws. Seal unused holes in the cover with the included screws and nuts.
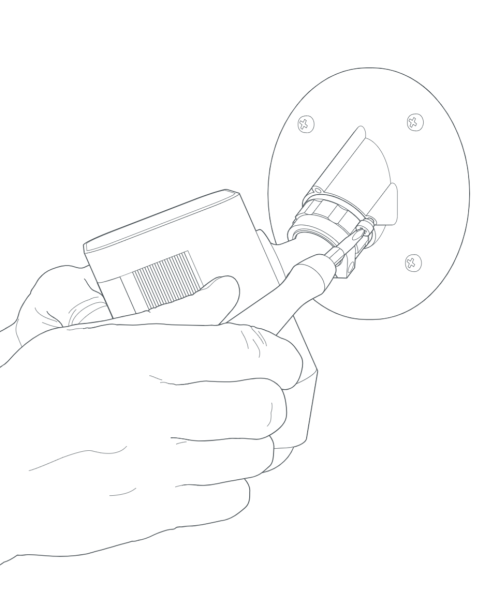
Mount your Spotlight Cam, Wired.
Insert your Spotlight Cam into the box cover. Once it’s fully seated, turn to the right to lock it in.
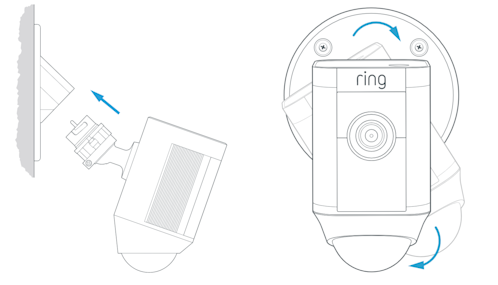
Add the security screw.
Insert and tighten the security screw to lock your Spotlight Cam Wired into the box cover.
Turn on power at the breaker.
Once your Spotlight Cam is installed, it’s time to turn power back on at the breaker.
If the lights on your Spotlight Cam turn on, you’re all set!
If not, turn power off at the breaker and use the diagrams here to check your wires are correctly connected.