Deurbellen op batterij installeren
Bekijk en download installatiehandleidingen voor Ring-videodeurbellen.
Ontdek hoe je de Ring-deurbellen op batterij installeert.
Inbegrepen hardware: Montageschroeven (A) Montagemoeren (A) Beveiligingsschroef (B) Daarbij worden sommige apparaten geleverd met: Kantelmontageset of hoekmontageset Korte beugelschroeven (C) Middelgrote hoekmontageschroeven (C) Extra montagepluggen (C) Lasdoppen (D) Draadverlengers (D) Benodigd gereedschap: Kruiskopschroevendraaier Boor met een boortje van 6 mm (optioneel) | 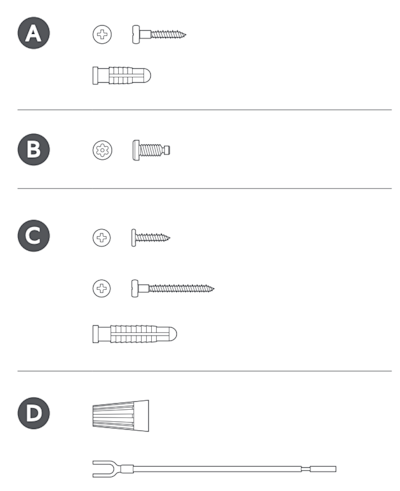 |
Voor bedrade deurbellen
Stap 1: laad de batterij op
Meer informatie over het opladen van de batterij van je deurbel.
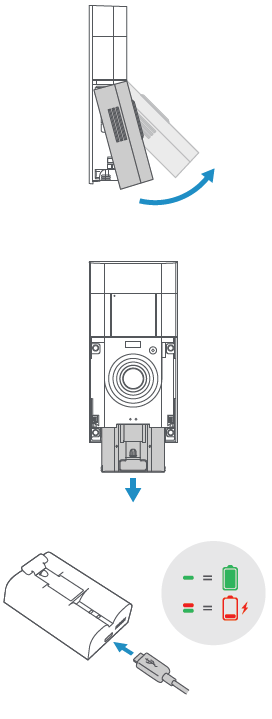
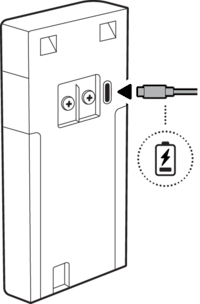
Deurbellen met een verwisselbare batterij
- Draai de beveiligingsschroef aan de onderkant van het voorpaneel los.
- Verwijder het voorpaneel van de deurbel door op de zijkanten te drukken en het paneel voorzichtig los te trekken.
- Sluit de oplaadkabel aan op de oplaadpoort van de batterij. Tijdens het opladen branden twee lampjes op de batterij: een groene en een oranje. Laad de batterij op totdat alleen het groene lampje blijft branden.
Deurbellen met een ingebouwde batterij
Laad de ingebouwde batterij op door deze met de meegeleverde oplaadkabel op een USB-voedingsbron aan te sluiten. Wanneer de ledcirkel op de deurbel volledig oplicht, is de batterij opgeladen.
Stap 2: stel de deurbel in via de Ring-app
Open de Ring-app en tik op Een apparaat instellen. Zodra dit is voltooid, gebruik je livebeeld om de camerabeelden en de videokwaliteit te controleren.
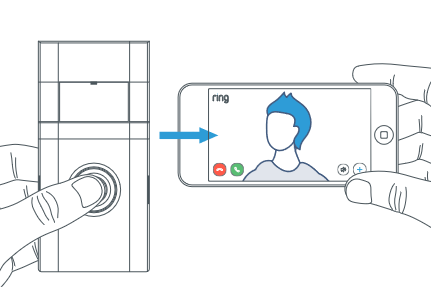
Meer informatie over het instellen van je deurbel via de Ring-app. Meer informatie over het oplossen van audio- en videoproblemen.
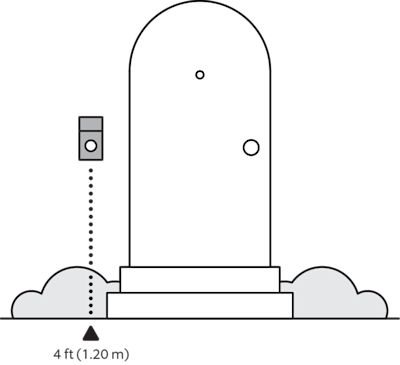
Stap 3: plaats de deurbel
Monteer de deurbel 1,2 meter boven de grond voor het beste resultaat. Meer informatie over het plaatsen van de deurbel.
Stap 4: bereid het montageoppervlak voor
Bij gebruik van een kantelmontageset, hoekmontagesetof montagebeugel met je apparaat, installeer je deze voordat je de deurbel monteert.
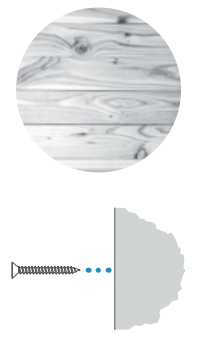
Installatie op een houten oppervlak
Boren en pluggen zijn niet nodig.
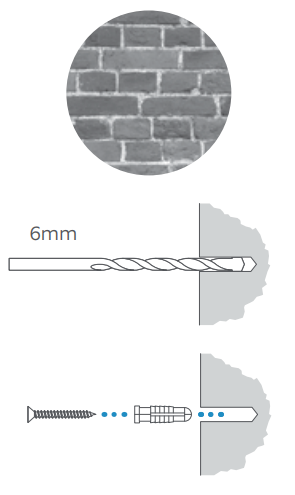
Installeren op een metselwerkoppervlak
- Gebruik de gemarkeerde locaties voor schroefgaten en boor voorboorgaten met een boortje van 6 mm.
- Plaats de meegeleverde pluggen.
Stap 5: sluit optionele stroombronnen aan
Je kunt een zonnelader, stekkeradapter of bestaande deurbelbedrading gebruiken om je deurbel van een druppellader te voorzien. Sluit de stroombronnen aan (zonnelader, stekkeradapter of deurbelbedrading) vóór de montage. Gebruik slechts één stroombron.
Zonneladers
Zorg ervoor dat je de zonnelader op een plek installeert waar deze direct zonlicht opvangt. Meer informatie over het installeren van een zonnelader voor je deurbel.
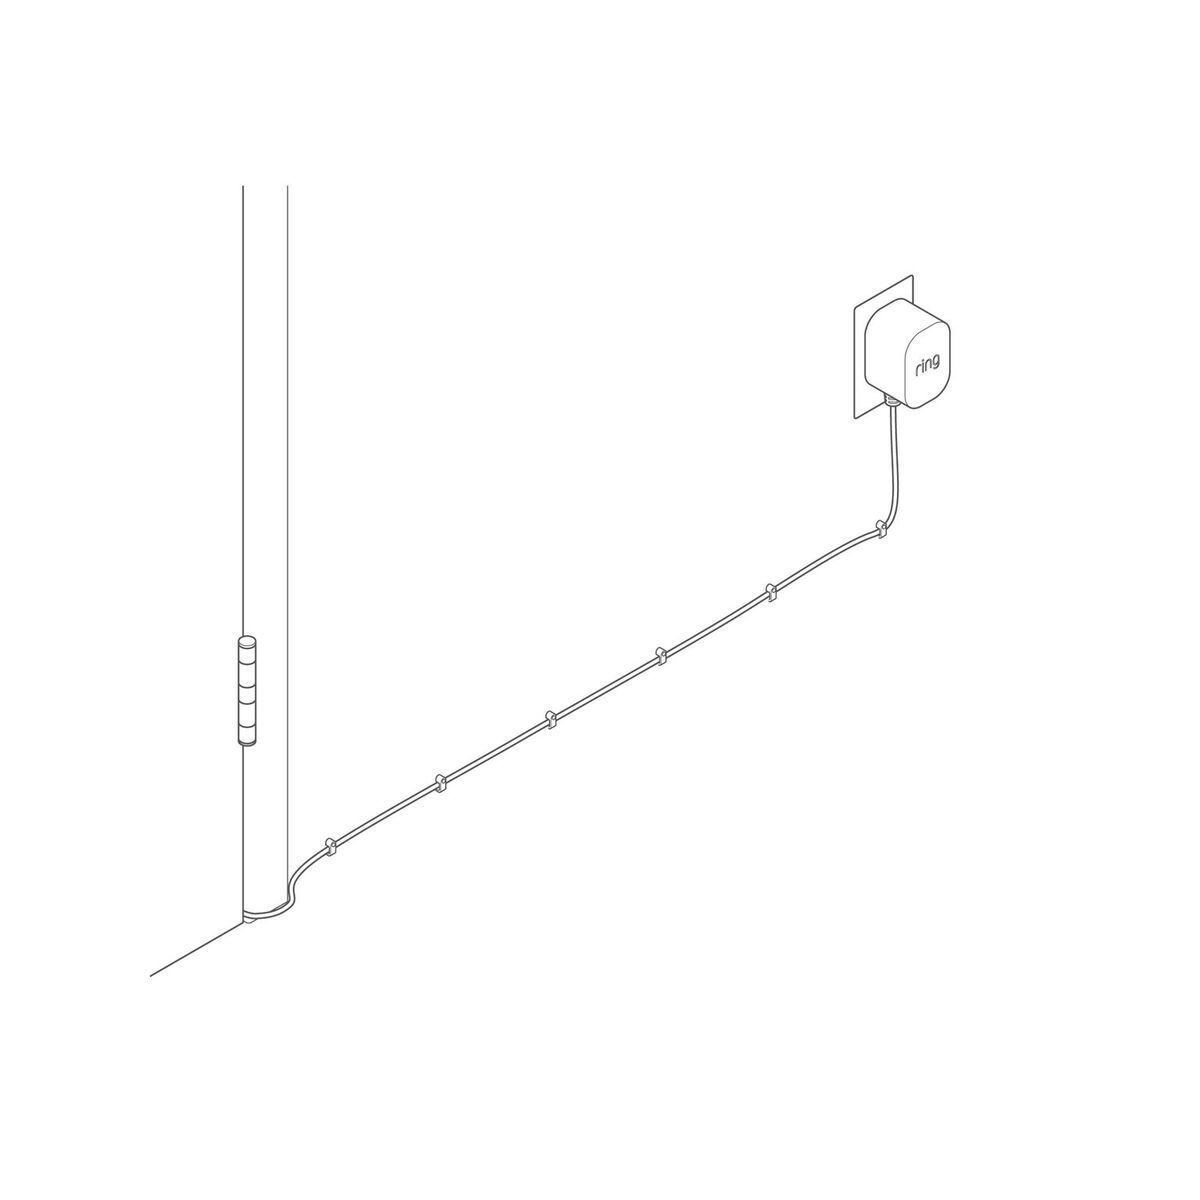
Stekkeradapter
Als je een stekkeradapter gebruikt, ga je naar de Ring-app en selecteer je Geen deurbel of Geen via de instellingen voor het type deurbelgong. Meer informatie over het instellen van de deurbelgong.
- Voer de adapterdraden door de beugels en sluit deze aan op de deurbelaansluitingen aan de achterzijde.
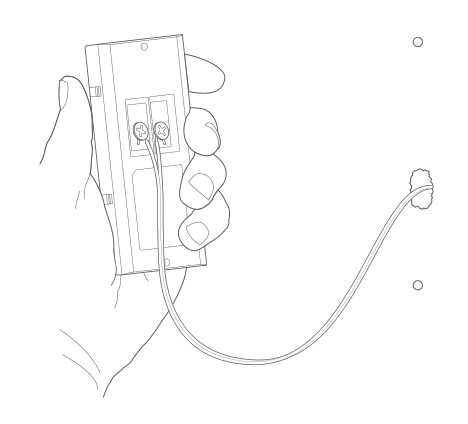
- Steek de adapter in het stopcontact.
- Zet de kabel vast met klemmen.
Aansluiten op een gong voor binnen of transformator
Je deurbel op batterij kan een bestaande deurbelknop vervangen om een compatibele gong voor binnen te activeren of druppellading te ontvangen van een compatibele transformator. Meer informatie over het aansluiten van je deurbel op een gong voor binnen of een transformator.
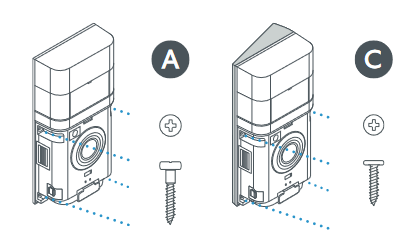
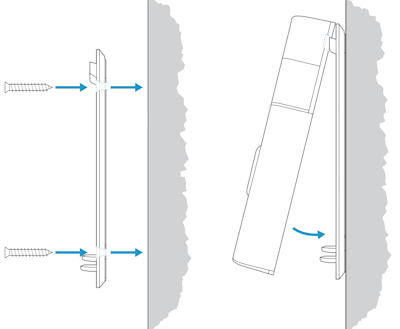
Stap 6: monteer de deurbel
Deurbellen met een verwisselbare batterij
- Verwijder de batterij.
- Bevestig de deurbel aan de muur met behulp van de schroeven in zakje A, of aan de hoekmontageset met behulp van de korte beugelschroeven in zakje C.
- Plaats de batterij terug in de deurbel.
- Plaats het voorpaneel terug.
Direct aan een muur bevestigen / bevestigen aan een kantel- of hoekmontageset
Deurbellen met een ingebouwde batterij
- Bevestig de bevestigingsbeugel met de vier schroeven uit zakje A.
- Hang de deurbel aan de bovenste opening van de beugel.
- Druk naar beneden totdat deze gelijk ligt met de beugel.
Stap 7: zet de deurbel vast
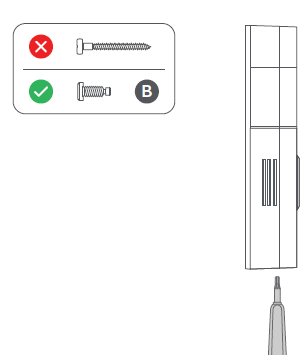
LET OP! Als je de verkeerde schroeven gebruikt om het voorpaneel te bevestigen, kun je tijdens de installatie de batterij beschadigen, brandgevaar veroorzaken, en ernstig letsel oplopen.
Gebruik de meegeleverde schroevendraaier om de beveiligingsschroef aan te brengen en vast te draaien.