
Indoor Cam (1st Gen) Installation Guide
Learn how to install Indoor Cam (1st Gen) to help protect what matters most inside your home.
1. Set up your Indoor Cam with the Ring app.
Download the Ring app
The Ring app walks you through setting up and managing your Indoor Cam. Search for “Ring” in one of these app stores, or visit: ring.com/app.
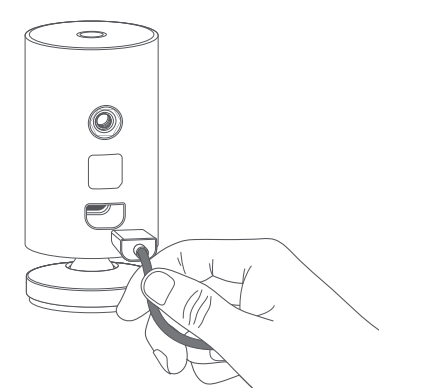
Power it up: First, plug the included power cable into the back of your Indoor Cam. Then plug the power supply into a socket.
Set up your Indoor Cam in the Ring app: In the Ring app, select Set Up a Device. When prompted, select Security Cams and follow the in-app instructions.
Try it out: After setup, tap the Live View button in the Ring app to see live video from your Indoor Cam.
Blue light flashing? If the light on the front of your Indoor Cam is flashing after setup, it’s updating its software. Do not unplug your Indoor Cam while the light is flashing!
Learn more about setting up Indoor Cam in the Ring app
2. Install your Indoor Cam
Choose a location
Indoor Cam is happy just about anywhere inside. It comes ready to sit on a flat surface like a table or shelf, but can also be mounted to a wall.
Choose a spot where it can provide the view you want, within reach of a power socket.
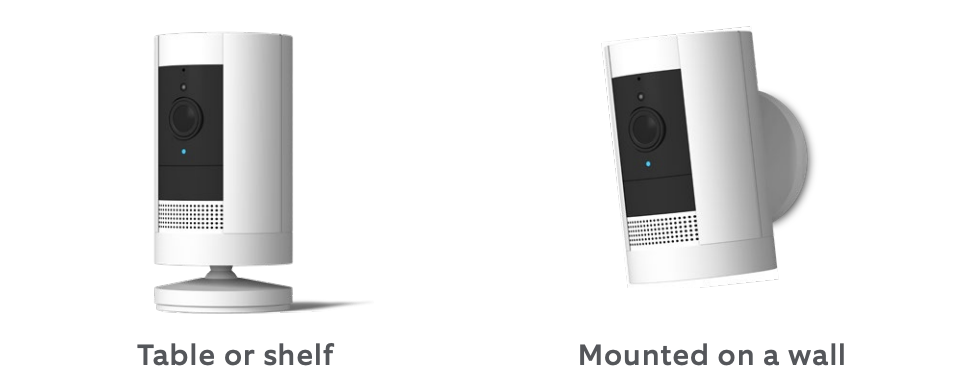
How to use your Indoor Cam on a table or shelf
Place it at your chosen location, then plug it in. Your Indoor Cam is now ready to protect you. Once you’re done, check out the live video in the Ring app to make sure you have the view you want.
How to mount your Indoor Cam on a wall
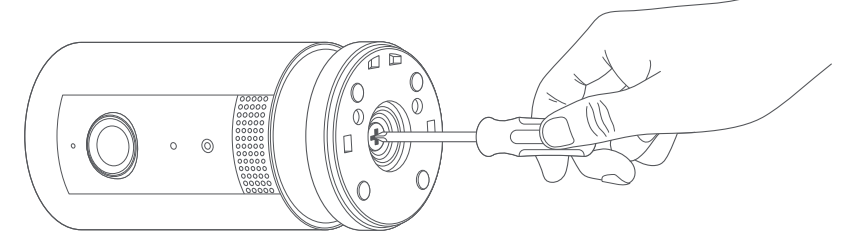
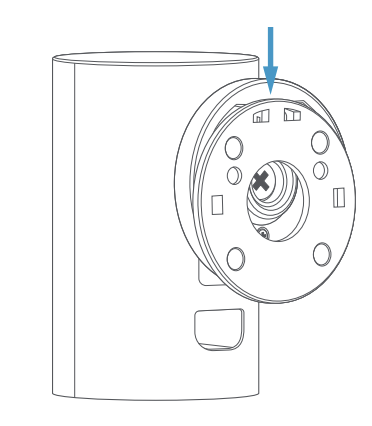
Remove the base
Unscrew it using a standard Phillips-head screwdriver (not included).
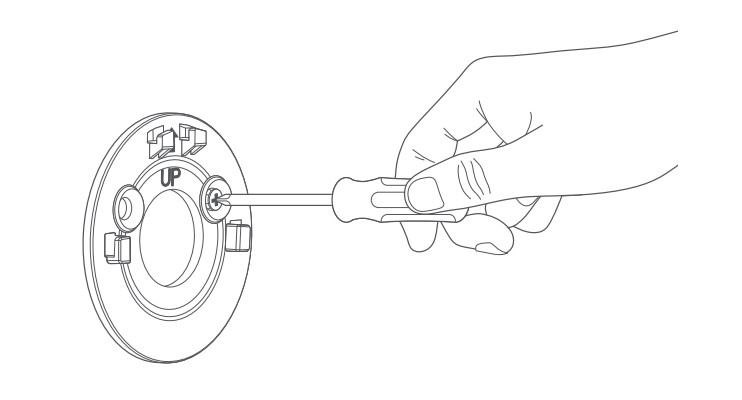
Re-attach the base
Screw it into the back of your Indoor Cam with the “UP” arrow on the bracket pointing upwards.
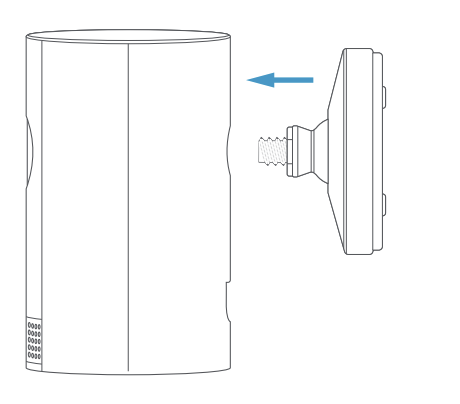
Remove the mounting bracket
Slide it down. It’ll come right off the base.
Drive the screws
Hold the plate against your wall, making sure the “UP” arrow is pointing up, and mount it with the included screws.
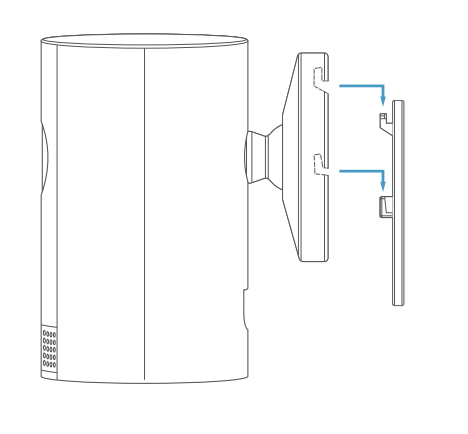
Mount your Cam
Gently guide the grooves in the base onto the hooks on the bracket. Slide Indoor Cam down to secure it in place.
Plug it in
Once secure, plug the power cord into your Indoor Cam, then plug the adapter into a power socket.
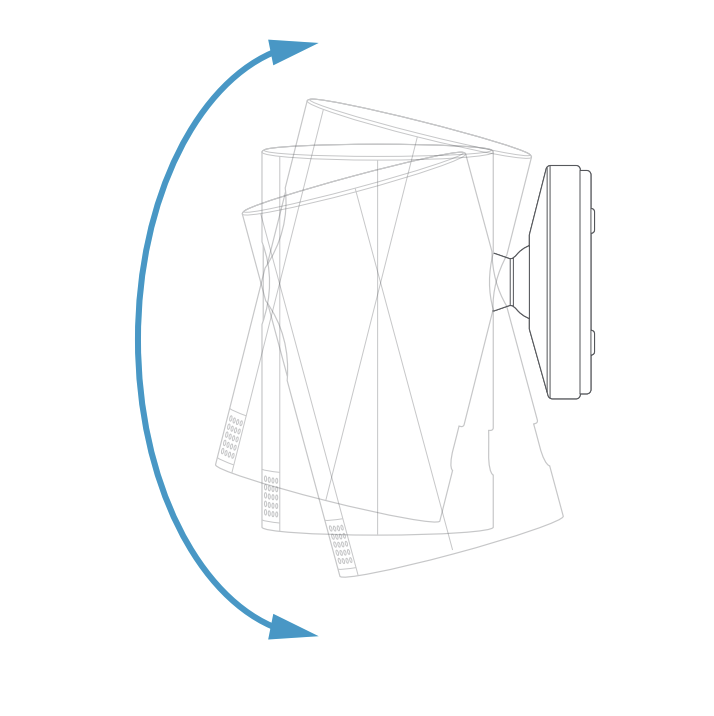
Adjust the view
Now check out the live video in the Ring app to make sure you have the view you want. Indoor Cam rotates on its base, so adjust the view as needed.
Your Indoor Cam is now ready to protect you!