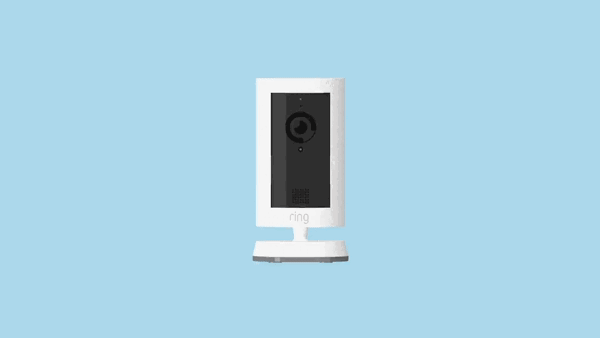
Installing Outdoor Cam
This article provides step-by-step instructions to install your Outdoor Cam Battery, Solar, or Plug-in. You can use both battery and plug-in power options together to take advantage of Dual Power mode.
Note: The Outdoor Cam was previously Stick Up Cam (3rd Gen).
Check out our installation manuals
View the manual for Stick Up Cam (3rd Gen) Battery (US English, French Canadian and Latin American Spanish).View the manual for Outdoor Cam Plus Battery (English, Canadian French, Latin American Spanish)View the manual for Outdoor Cam Plug-In (US & CAN)Pan-Tilt Mount installation
Learn more about installing your Pan-Tilt Mount.
Watch the video guide for installing the Outdoor Cam Battery or Solar
Watch the video guide for installing the Outdoor Cam Plug-In
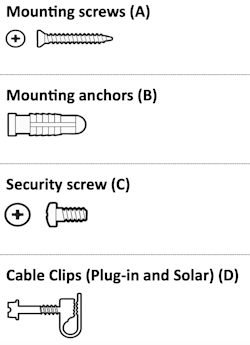
Hardware included
Tools needed
- Phillips-head screwdriver
- Drill with 0.24 in (6 mm) drill bit (optional)
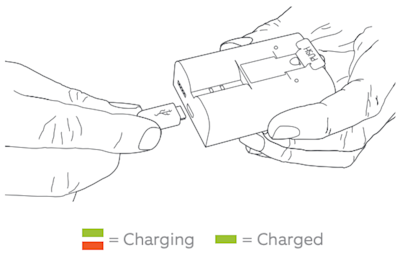
Step 1: Charging the Quick Release Battery
Learn more about charging the Quick Release Battery for your Outdoor Cam Battery and Solar.
1. Charge the battery. Connect the charging cable to the battery's charging port. While charging, your battery displays two colored lights, a solid green and an amber light. Charge the battery until only the green light remains lit.
2. Twist the battery cover counterclockwise to unlock, then remove it from your Outdoor Cam.
3. Insert the charged battery into the bottom of your Outdoor Cam until it clicks into place. Place the battery cover back onto your Outdoor Cam, turning it clockwise.
Step 2: Setting up your camera in the Ring app
Learn more about setting up your Outdoor Cam in the Ring app.
Step 3: Positioning your Outdoor Cam
Position on a wall, ceiling, or eave
Learn more about positioning your Outdoor Cam.
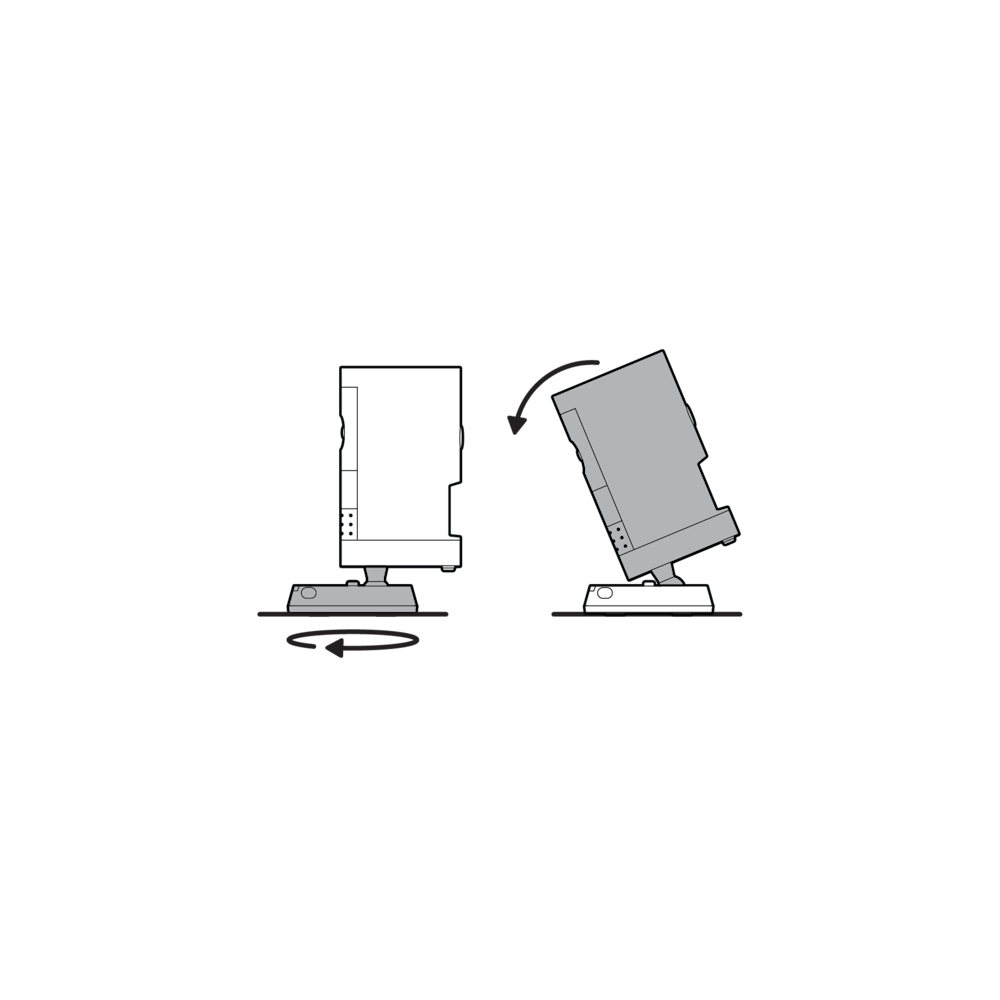
Position on a table or shelf
The Outdoor Cam includes a pre-installed base for placement on flat surfaces.
Adjust the camera angle
Rotate the base so its longer side faces forward, then tilt the camera downward.
Step 4: Installing on a wall or ceiling
To install on a ceiling, use the mount for Outdoor Cam.
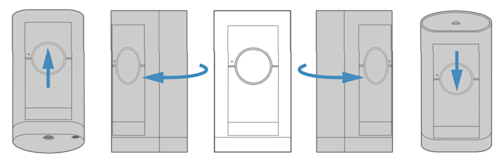
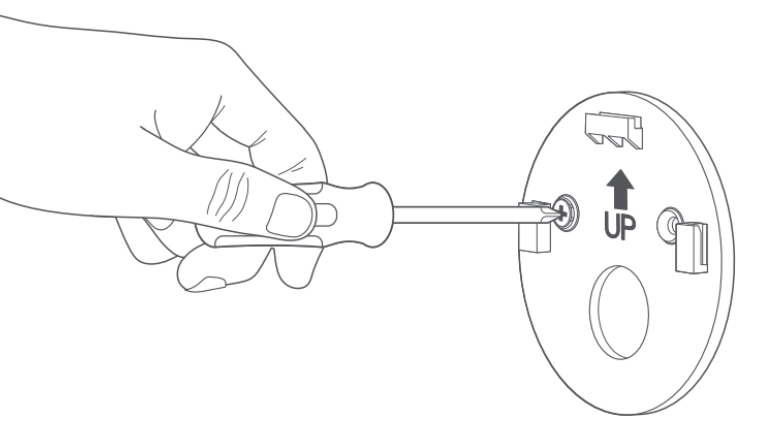
Install the mounting plate
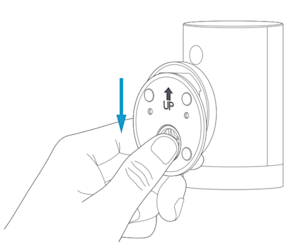
- On walls:UParrow points upward.
- On ceiling and eaves:UParrow points toward target area.
Warning: Only use the included mounting screws when securing the mounting plate, and avoid positions that have electrical wiring behind the plate. Do not drill into your home's electrical wiring.
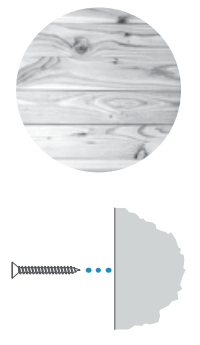
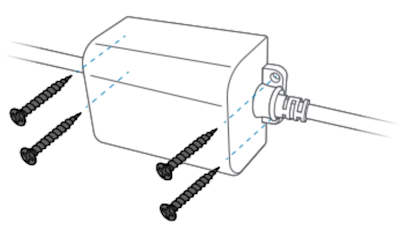
If installing on a wood surface, screw the mounting plate directly into the wall.
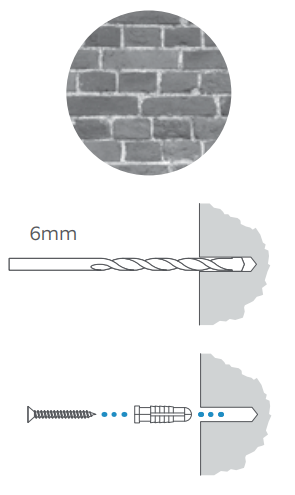
If installing on a masonry (concrete, brick, or stucco) surface, mark four screw holes using the plate as a guide. Drill pilot holes using a 0.24 in (6 mm) drill bit. Insert the included wall anchors, then drive the four mounting screws through the mounting plate into the wall anchors.
Connect camera to the mounting plate
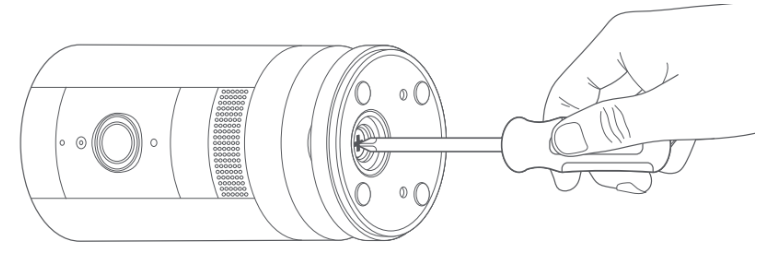
1. Unscrew the base using a Phillips head screwdriver.
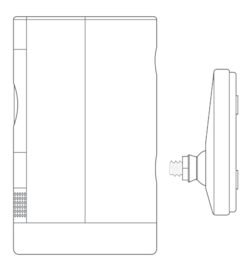
2. Secure the base to the camera's back, with the UP arrow pointing upward.
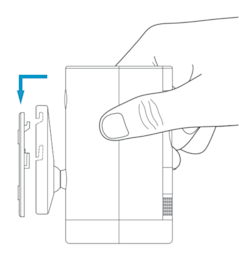
3. Slide the mounting bracket down to remove it from the base.
4. Align base grooves with bracket hooks, then slide downward until the camera locks in place.
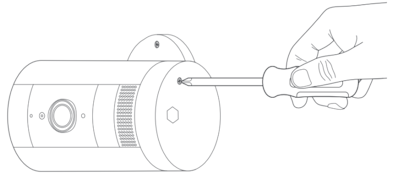
Step 5: Installing security screws
The Outdoor Cam includes two security screw locations:
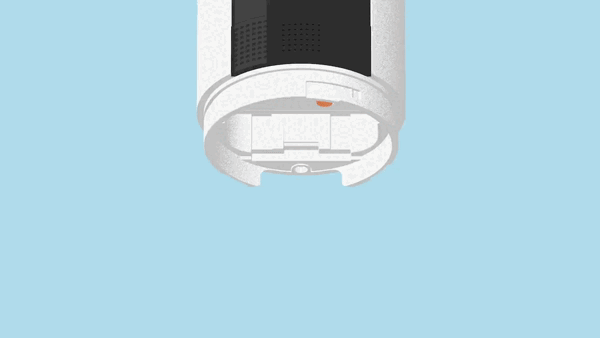
- Battery compartment security point.
- Mounting bracket security point.
Remove rubber plugs from desired locations to access screw holes.
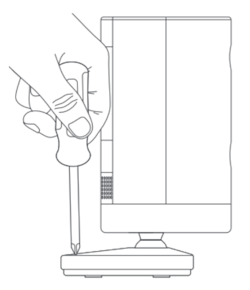
Installing security screws when mounting on a table or shelf
1. Rotate base's longer edge forward, then tighten security screw using a Phillips head screwdriver.
2. Flip camera to access battery compartment, then insert second security screw.

Installing security screws when mounting on a wall
1. Remove camera from mounting bracket. Then remove base rubber plug, reattach camera, and tighten security screw using a Phillips head screwdriver.
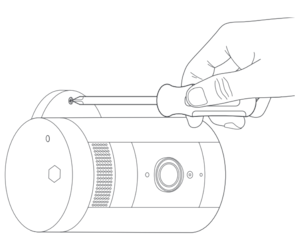
2. Remove battery compartment cover, extract rubber plug, then reattach and secure cover with provided security screw using Phillips head screwdriver.
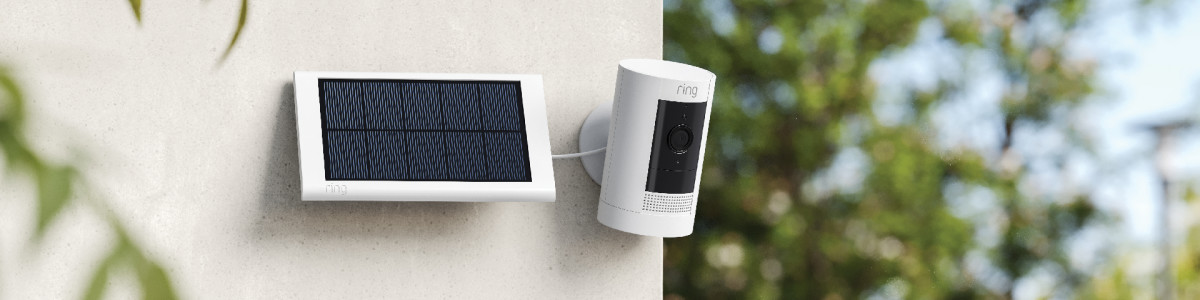
Step 6: Connecting Plug-In Adapters or Solar Panels
Follow our guide for installing your Ring Solar Panel before connecting it to the camera. If using plug-in or a solar panel, connect the cable to the back of the Outdoor Cam.
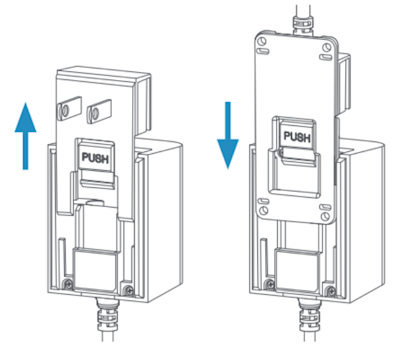
Using a Plug-In Adapter outdoors
Press PUSH button to remove indoor faceplate, then connect outdoor power cable to adapter until it clicks securely.
Secure any cables and adapters
Secure cables with provided wall clips. For masonry surfaces (brick/stucco), drill 0.24 in (6 mm) holes and insert anchors before mounting clips.
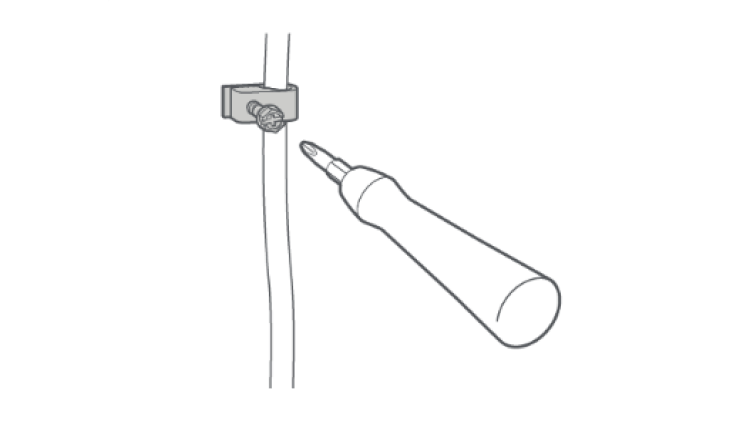
For plug-in models, secure power adapter to wall using provided screws.
Step 7: Adjusting the camera angle
You can rotate the camera to adjust the field of view.
- Remove the protective film from the device to allow motion detection and proper view.
- Use the Live View feature in the Ring app to make sure the camera is monitoring the desired area. Rotate the camera to adjust the view accordingly.