
Pro Power Cable vs Pro Power Kit v2 for Ring Wired Doorbell Plus
Learn the difference between the Pro Power Cable and a Pro Power Kit v2, and how to install them both.
Originally, Wired Doorbell Plus came with a Pro Power Cable to bypass an internal doorbell chime. Now, Ring Wired Doorbell Plus comes with a Pro Power Kit v2 to bypass an internal doorbell chime.
The advantage of the Pro Power Kit is a resettable fuse, which means you can easily turn the power off and back on again in the event of a power trip or malfunction.
Installing the Pro Power Kit v2
To bypass your internal doorbell chime with the Pro Power Kit v2, complete the following steps:
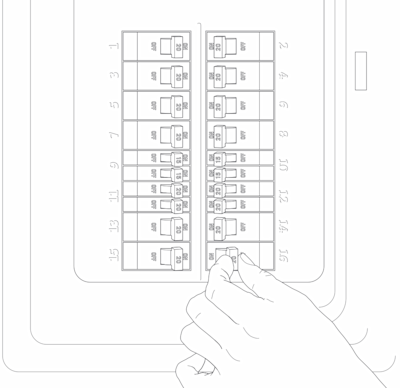
1. Turn off power at the breaker.
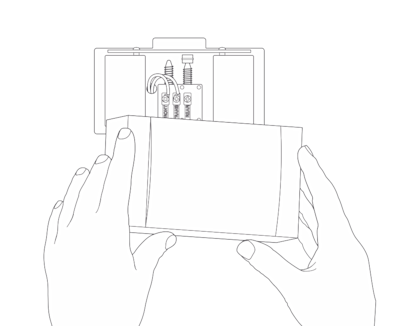
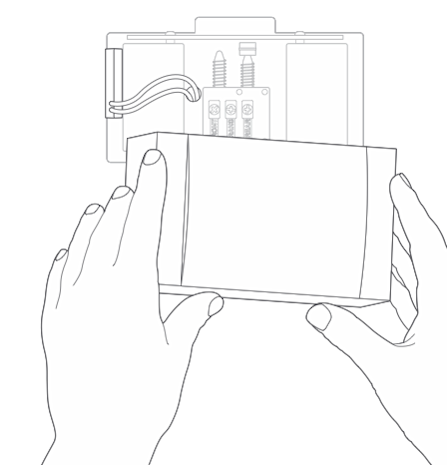
2. Remove the cover from your internal doorbell chime.
3. Loosen the screws holding the doorbell wires.
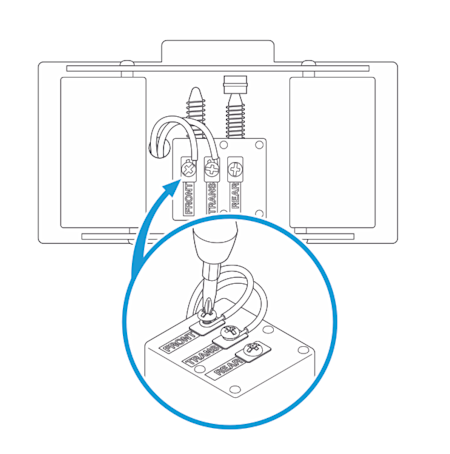
4. Detach the doorbell wires from the internal doorbell chime and straighten the ends.
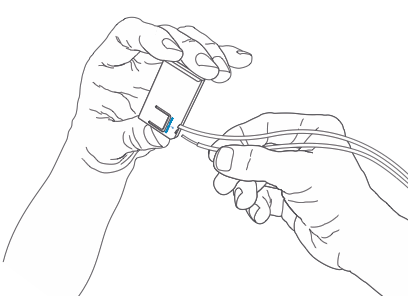
5. Firmly insert the doorbell wires into the ‘Bypass Mode’ holes on the Pro Power Kit v2 until they lock into place.
6. Replace the cover on your internal doorbell chime.
7. Turn the power back on at the breaker.
8. In the Ring app, select your Ring Wired Doorbell Plus, then tap the gear-shaped icon and set Doorbell Type to ‘None’.
If you ever need to remove your doorbell wires from the Pro Power Kit v2, press down on the lever on the rear to open the terminal clamps, then pull the wires straight out.
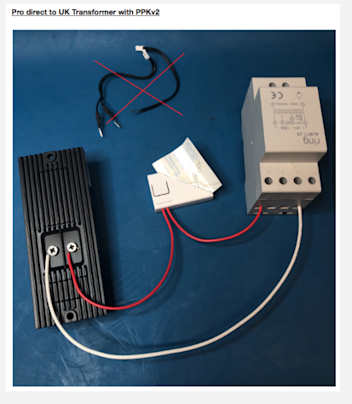
Installing the Pro Power Cable
To bypass your internal doorbell chime with the Pro Power Cable, complete the following steps:
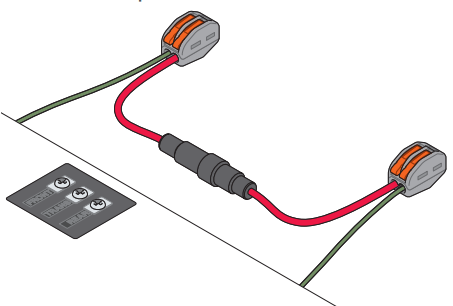
Your Pro Power Cable should have two grey wire clips already fastened to the red wiring. For ease of installation, unclamp the clips that have no wires connected to them.
1. Remove the cover from your internal doorbell chime.
2. Loosen the terminal screw for the wire labeled Front. Open the orange lever on the wire clip and insert the wire, snapping the orange lever down to lock it in place. The red wire supplied with your device should be on the other side of the wire clip.
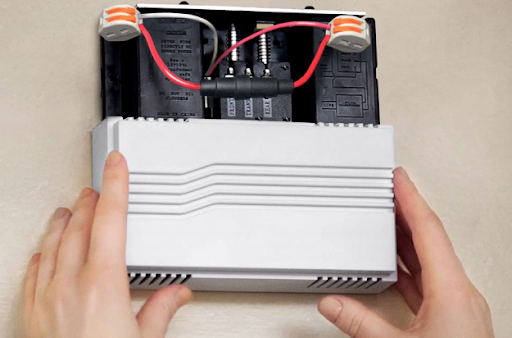
3. Repeat for the transformer wire on the other end. The final arrangement should look like this:
4. Finally, replace the cover on your internal doorbell chime.
If you set up your Ring Wired Doorbell Plus earlier, it will reconnect to the same wifi network it was previously connected to.
Final Step: Check doorbell type
In the Ring app, select your Ring Wired Doorbell Plus, then tap the gear-shaped icon and make sure you've set Doorbell Type to ‘None’.