
Installing Ring Alarm Contact Sensors on Different Types of Doors, Windows, and Trim
Learn how to properly install Ring Alarm Contact Sensors on different surfaces to keep your doors and windows secure.
How to install a Ring Alarm Contact Sensor (2nd Gen).
There are some things to know before you begin:
- The Contact Sensor is made up of two parts, the sensor and the magnet. One part should be mounted on the door or window, the other on the trim. It doesn't matter which one goes where.
- The sensor and magnet need to be close together.
- Contact Sensor (1st Generation): The sensor and magnet should be no more than 1/2" apart
- Contact Sensor (2nd Generation): The sensor and magnet should be no more than 1" apart
- When mounting the Ring Alarm Contact Sensor (1st Generation), make sure the notches are lined up.
- Don't use the Contact Sensor on the side of the door with the hinge.
- Only use Contact Sensors indoors. They aren't intended for outdoor use.
- You can install the Contact Sensor using the included mounting tape or screws and anchors.
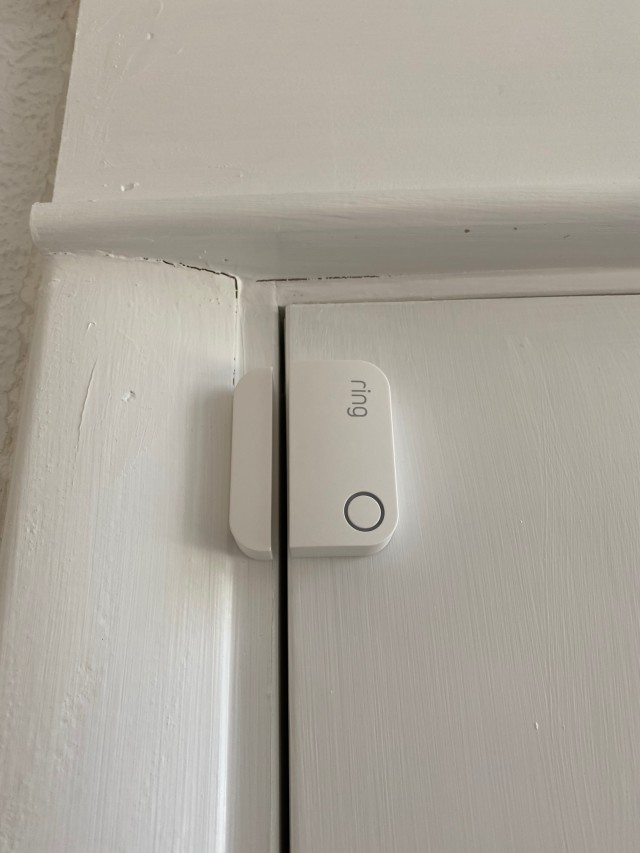
Ring Alarm Contact Sensor (1st Generation)
 |  |
 If you don't have space to fit the whole Magnet on your door trim, you can remove the internal magnet and mount that piece inside. | 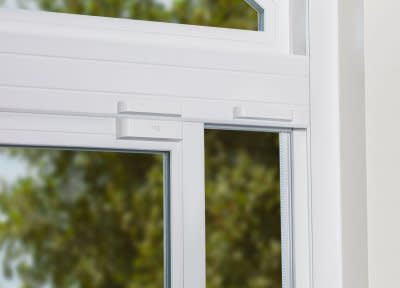 You can add an Open Window Magnet to keep your home secure while you get fresh air. |
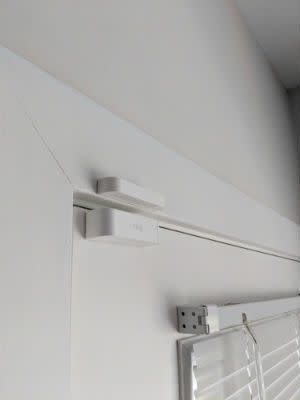
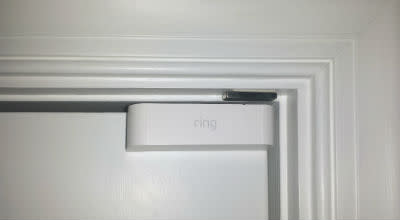
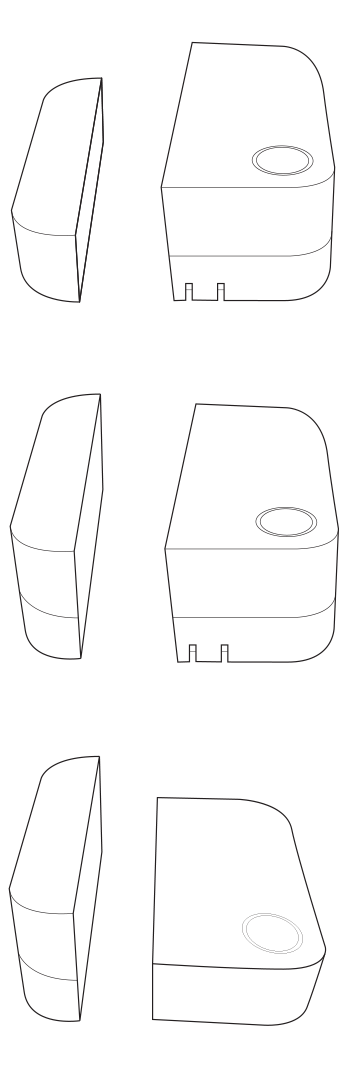
Ring Alarm Contact Sensor (2nd Generation)
 |  |
 |  |
 |  |
Using a Ring Alarm Contact Sensor Riser
If you are still having a problem getting your Contact Sensor (2nd Generation) positioned correctly, a Ring Alarm Contact Sensor Riser (sold separately) could be the solution. Window and door finishes are sometimes uneven and prevent the sensor and magnet from being within the required 1-inch maximum detection gap.
The Riser adds 3/8 inch (10mm) in height to the Contact Sensor. It also comes with an additional Magnet that is 3/8 inch (10mm) taller than your original one. Use these accessories as needed to improve the positioning and function of your Contact Sensor.
Note: The Riser only works with the Ring Alarm Contact Sensor (2nd Generation). For indoor use only.
How to install the Contact Sensor Riser
To install the Contact Sensor Riser, follow these steps:
 | 1. Disarm your Ring Alarm system using the Ring app or Keypad. 2. Slide the Contact Sensor off of its mounting bracket. 3. Attach the mounting bracket to the Riser. Make sure it snaps in securely. 4. Slide the sensor onto the Riser. Make sure it slides in completely. 5. Install the sensor and magnet and make sure that they are within the required 1-inch maximum detection gap. 6. Open your door or window to confirm that the Contact Sensor detects when the door or window is opened and closed. |
Tips for installing your Contact Sensor (2nd Generation).
How to install Contact Sensors on different types of doors and windows
Doors
Door type: Panel
Recommended number of Contact Sensors: 1
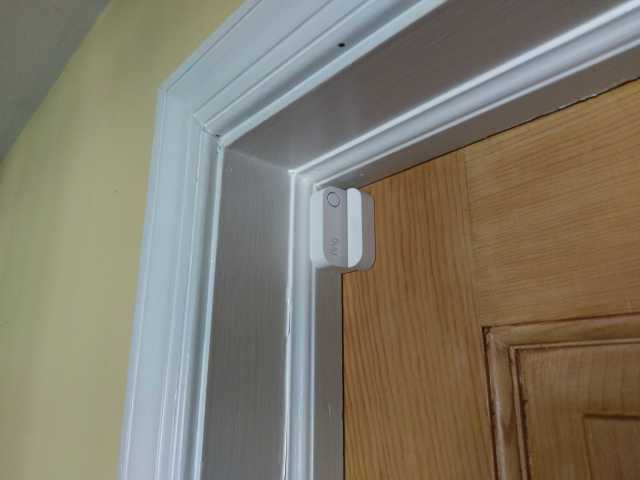
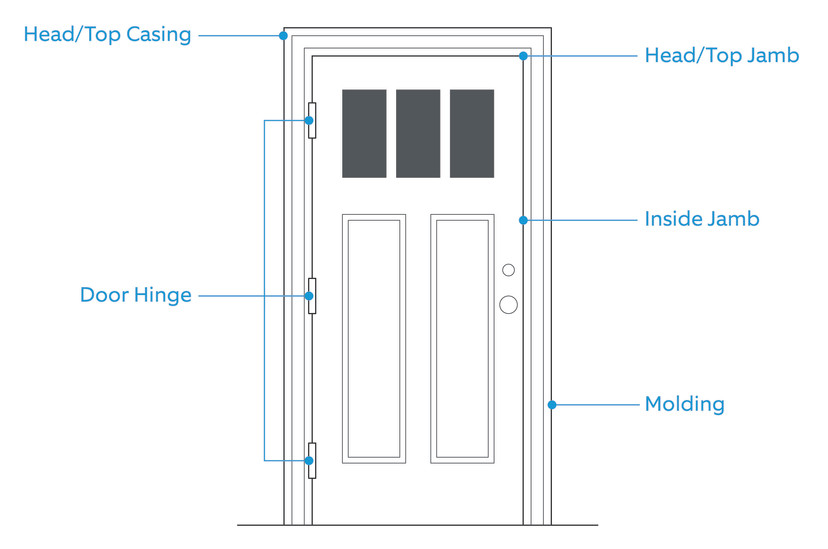
Best options for installation: The basic flat panel door is the easiest type of door to install sensors on. Simply install the Sensors and the magnet along the top casing or inside jamb of the door and make sure their grooves are aligned with one another when the door is closed.
Installation considerations: While this is the easiest sensor to install, you should still look out for these installation issues:
- Be sure to install your Sensor in such a way that it won’t get knocked off when the door opens.
- Make sure that the Sensor and magnet will be no more than ½ inch apart when the door is closed.
- Depending on how the door hangs on the wall, it may not be possible to install the magnet and Sensor are flush with one another.
- Weatherstripping on the door or casing may make it impossible to find a place to stick on the Sensor.
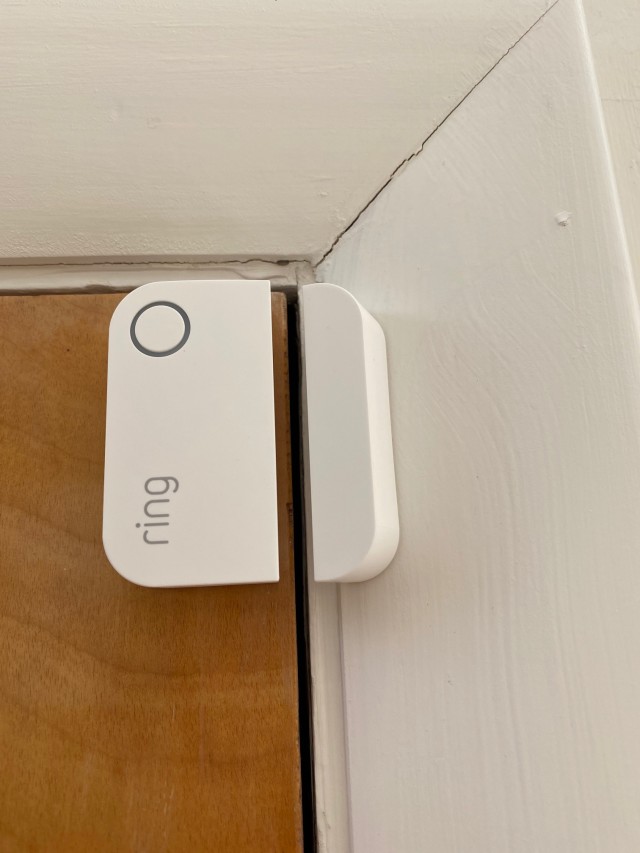
Door type: Flush
Recommended number of Contact Sensors: 1
Best options for installation: Like the panel door, you shouldn't have too much trouble installing a Contact Sensor on a flush door. Just install the Sensor along the top casing or jamb, and the other piece on the door itself.
Installation considerations: The major consideration for this type of door comes about because of trim choices. No trim, no problem. If you do have a trim, see the trim advice below.
- Be sure to install your sensor in such a way that it doesn't get knocked off when the door opens.
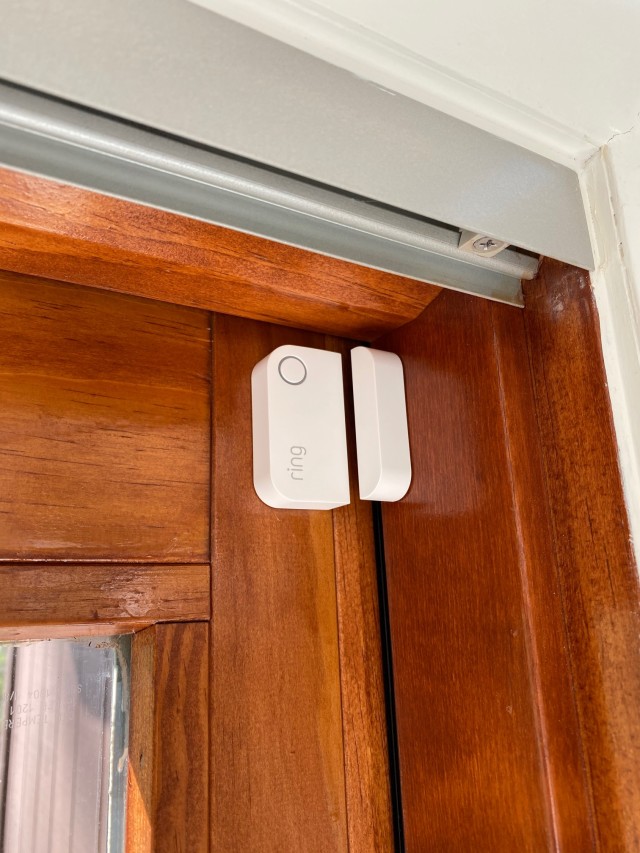
Door type: French
Recommended number of Contact Sensors: 2
Best options for installation: The unique way French doors open brings up new considerations. You'll need one Contact Sensor for each door so you can detect when either door is opened. The best place to put them is along the gap between the doors. At a pinch, you can also install them along the top casing or head jamb.
Installation considerations: French doors can make for a unique contact sensor installation. The following lists the most common considerations for french doors:
- Be sure to install your Contact Sensor in such a way that it doesn't get knocked off when a door opens.
- Be sure to name your Contact Sensor in the Ring app according to which door it is installed on. This will eliminate confusion.
- Depending on how the door hangs on the wall, it may be impossible to install the magnet and sensor flush with one another.
Door type: Pocket
Recommended number of Contact Sensors: 1
Best options for installation: We've listed one Sensor for this type of door, but the truth is that it's extremely difficult to install traditional Contact Sensors along this type of door. If you need to add a Sensor to this type of door, the best place to do it is along the side casing and side jamb.
Installation considerations: Your ability to install Contact Sensors on a pocket door will depend on the width of the opening. If the opening is too narrow, you will most likely need recessed sensors in order to securely monitor this type of door.
Door type: Bypass
Recommended number of Contact Sensors: 1
Best options for installation: As long as you put the sensor on the inside door, you shouldn't have a problem installing a Sensor on a bypass door. Just place it in the gap between the first door and the top casing/head jamb.
Installation considerations: Remember, you won't be able to install your Contact Sensor on the outer door. Otherwise, the following lists the most common considerations for bypass doors:
- Be sure to install your Sensor in such a way that it doesn't get knocked off when a door opens
- Depending on how the door hangs on the wall, it may be difficult to install the magnet and Sensor flush with one another.
Door type: Bifold
Recommended number of Contact Sensors: 1 or 2 (one per door)
Best options for installation: For bifold doors, your best bet is to place the Sensor along the gap between the doors or along the top casing/head jamb.
Installation considerations: The biggest consideration with bifold doors is that they have a tendency to shift over time. Keep an eye on the position of the sensors and adjust if you find they're beginning to drift apart. Otherwise, the following lists the most common considerations for bypass doors:
- Be sure to install your sensor in such a way that it doesn't get knocked off when a door opens
- Depending on how the door hangs on the wall, it may be impossible to install the magnet and sensor flush with one another.
- Try installing the Contact Sensor using double-sided tape rather than a screw. This will allow you to move the sensor over time.
Windows
Window type: Single-Hung
Recommended number of Contact Sensors: 1
Best options for installation: Single-hung windows are almost ideally configured for Alarm sensors. Simply install them along the top casing/head jamb or along the side casing/side jamb.
Installation considerations: Ideally you should have no problems installing a sensor onto a single-hung window. That said, you may find an issue depending on your trim choices.
Window type: Double-Hung
Recommended number of Contact Sensors: 1 or 2
Best options for installation: Double-hung windows offer you a lot of options when it comes to installing a Contact Sensor depending on whether the window only opens from the bottom or both the top and bottom panes open. Try along the top casing/head jamb, along the side casing/side jamb, or in the middle between the two panes.
Installation considerations: Be careful when installing the sensor that it doesn't come off when either of the window panes is opened. Depending on how the window is built, it may also be difficult to get the sensor and magnet to properly line up with one another.
Window type: Casement
Recommended number of Contact Sensors: 1 per pane
Best options for installation: Like double-hung windows, casement windows will need a separate sensor for each window pane. Try putting your Sensors along the gap between the window and along the top casing/head jamb.
Installation considerations: Be careful when installing the Sensor that it doesn't come off when the window panes are opened. Depending on how the window is built, it may also be difficult to get the Sensor and magnet flush against one another.
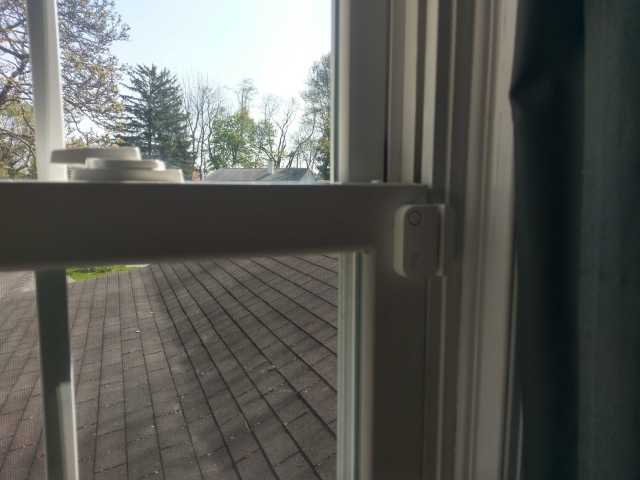
Window type: Slider
Recommended number of sensors: 1
Best options for installation: Ideally, you should be able to install the sensors along the gap between the first window and the top casing/head jamb.
Installation considerations: It's important to understand that you won't have enough room to install the sensor on the back window. It may also be difficult to install the sensor in such a way it doesn't get knocked off when the window opens. It may also be difficult to get the Sensor and the magnet flush together.
Window type: Awning
Recommended number of Contact Sensors: 1
Best options for installation: Given the way awning windows open, your best bet for installation is to put the sensor along the bottom casing/sill. Failing that, try along the side casing/side jamb.
Installation considerations: Depending on how the window opens, it may be difficult to install the sensor in such a way that it doesn't get knocked off when the window opens.
Window type: Hopper
Recommended number of Contact Sensors: 1
Best options for installation: Given the way hopper windows open, your best bet for installation is to put the sensor along the top casing/jamb. Failing that, try along the side casing/side jamb.
Installation considerations: Depending on how the window opens, it may be difficult to install the sensor in such a way that it doesn't get knocked off when the window opens.
Window type: Center-pivot
Recommended number of Contact Sensors: 1
Best options for installation: Center-pivot windows are actually one of the easiest types of windows to install sensors on. You can put sensors along the top casing/head jamb, the bottom casing/sill, or along the side casing/jamb.
Installation considerations: None, really. Most people should have no problem installing a sensor in a center-pivot window.
Window type: Jalousie
Recommended number of Contact Sensors: 0
Best options for installation: None. The unique construction of a jalousie window would require a lot of extra work to install a sensor. It's not recommended to even try. Try installing a motion sensor instead.
Installation considerations: For rooms with Jalousie windows, consider using a Motion Detector to provide security coverage for the room.
Trims
Trim type: Colonial
There is a large variety of trim types that can be broadly termed "Colonial." Most of them involve several layers separated by curved sections. If one of the layers is broad and flat enough to house a sensor, you're in luck. Otherwise, you're better off trying to install the Sensor somewhere on the window itself.
Trim type: Craftsman
There are a large variety of options available in Craftsman trim. Unlike Colonial, Craftsman trim tends to be fairly flat. Unless your Craftsman trim is unusually elaborate, you should have no problem mounting a sensor on the trim.
Trim type: Ranch
Ranch trims are excellent candidates for mounting a sensor since ranch-style trims tend to be unfussy with minimal details and curves. That being said, watch out for the occasional sharp angles on some ranch trim that may make it tougher than usual to mount.
Trim type: Provincial
Provincial trim has a lot of curves and scalloping that will make it difficult to mount a Contact Sensor on. In addition, the detail work on provincial trim may make it difficult to properly mount and align the Sensor.
Trim type: Brickmould
Brickmould adds some depth around the window, which may make it difficult to install the sensor and magnet. It's best to install the sensor and magnet perpendicular to each other, with one part on the sill or side jamb and the other part flat on the window casing.
Trim type: Flat
A flat casing is ideal for installing a sensor. You shouldn't have any trouble with installation on a flat trim.