Installing Stick Up Cam Pro, Plug-In
Download/view the manual (US English, French Canadian and Latin American Spanish).This article will outline the step-by-step process to install your Stick Up Cam Pro, Plug-In. Before you begin installing your Stick Up Cam Pro, Plug-In, make sure that you’re following safety code standards.
Quick Start
1. Download and open the Ring app.
2. Select Set Up a Device.
3. Scan QR code with the Ring app.
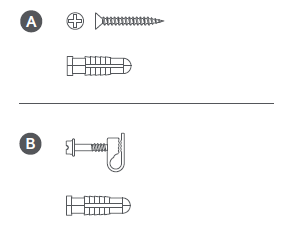
Hardware included
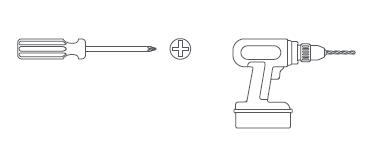
Tools needed
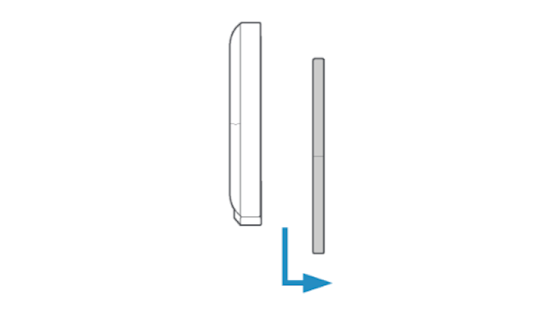
Remove protective film from device. This ensures your device works properly.
Plug USB-C Plug-In Adapter into your Stick Up Cam Pro.
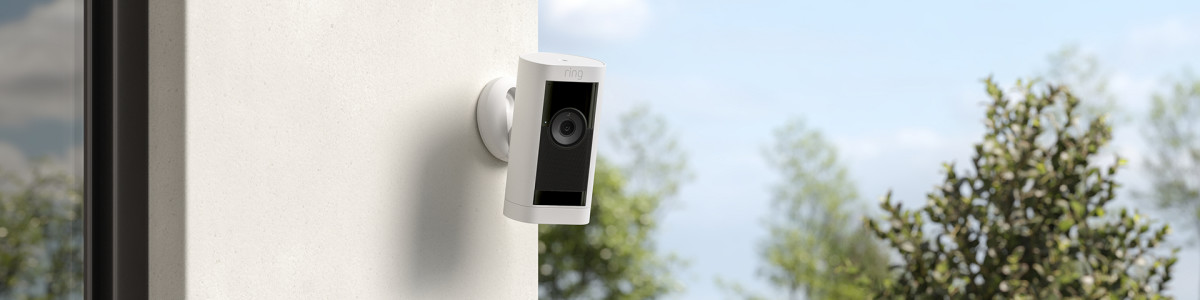
For outdoor installation

Choose a location with the view you want.
Your camera can be used both indoors and outside. It can sit freestanding on a tabletop, or be mounted on a wall or ceiling.
Freestanding installation
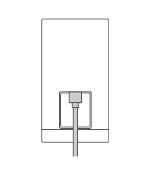
Place your camera on a tabletop or shelf and look at Live View in the Ring app to make sure it’s positioned correctly.
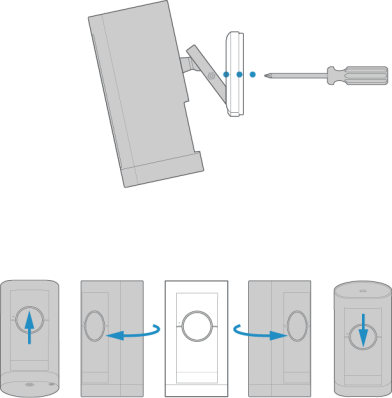
If you’d like your camera to have a downward angle, swivel the base around so that the longer side of the base is facing the front and tilt your camera so it points downward.
Wall installation
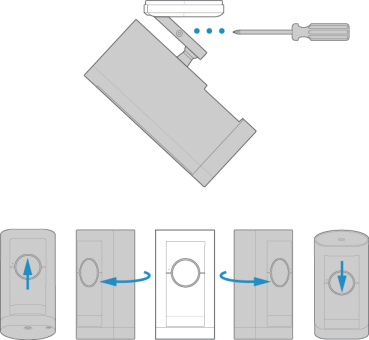
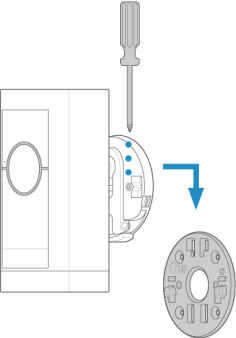
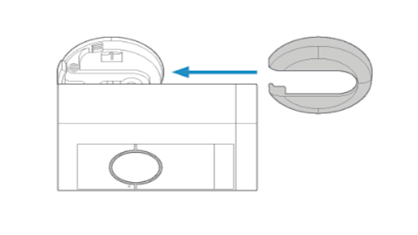
Remove the decorative cover from the camera mount.
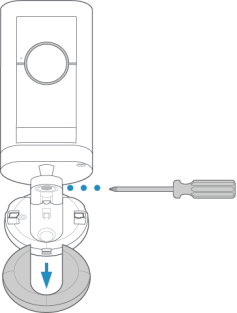
Use a standard Phillips-head screwdriver (not included) to unscrew the mount and detach it from the rest of the camera.
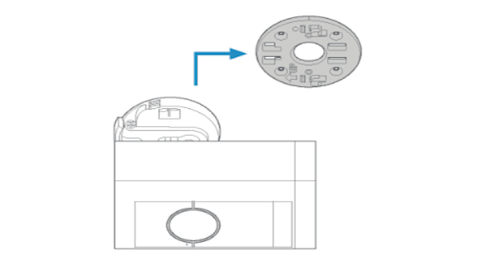
Install the mounting plate.
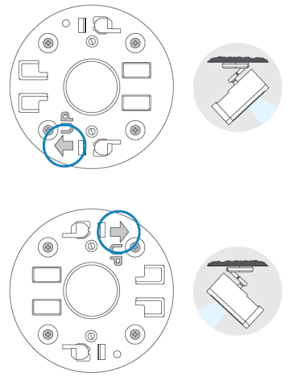
Slide the mounting plate off of the camera mount.

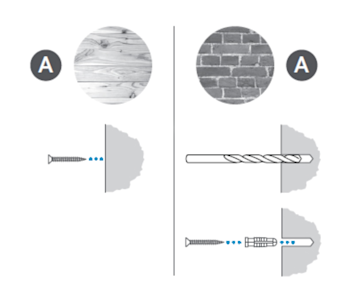
Place the mounting plate on the wall with the UP arrow pointing up.

If installing on a wood surface, screw the plate directly into the wall.
If installing on a masonry surface, mark four screw holes using the plate as a guide.
Drill pilot holes using a 1/4" drill bit. Insert the included wall anchors, then drive the four mounting screws through the mounting plate into the wall anchors.
WARNING! Only use the included mounting screws when securing the mounting plate.
CAUTION! DO NOT drill into your home’s electrical wiring.
Mount your camera to the wall.
Screw the mount onto the back of the camera.
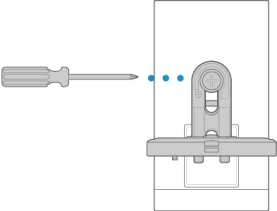
Slide the camera with its mount onto the mounting plate.
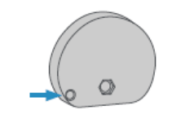
Tighten the security screw on the camera mount so that it’s firmly attached to the mounting plate.
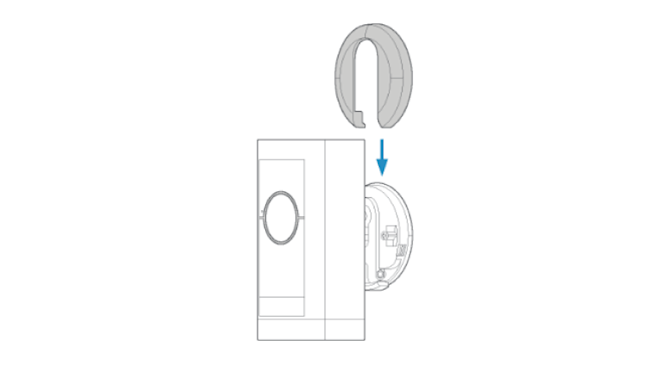
Slide the decorative cover back onto the camera mount and click it into place.
Secure the battery cover to the camera with the security screw (optional).
Adjust the camera angle.
Rotate the camera to focus on the area of your choice. Look at Live View in the Ring app to make sure it’s positioned at your desired angle.
Ceiling installation
Remove the decorative cover from the camera mount.
Use a standard Phillips-head screwdriver (not included) to unscrew the mount and detach it from the rest of the camera.
Install the mounting plate.
Slide the mounting plate off of the camera mount.
Place the mounting plate on the ceiling with the UP arrow pointing in the opposite direction from where your camera will face.
If installing on a wood surface, screw the plate directly into the wall.
If installing on a masonry surface, mark four screw holes using the plate as a guide.
Drill pilot holes using a 1/4" drill bit. Insert the included wall anchors, then drive the four mounting screws through the mounting plate into the wall anchors.
WARNING! Only use the included mounting screws when securing the mounting plate.
CAUTION! DO NOT drill into your home’s electrical wiring.
Mount your camera to the ceiling.
Screw the mount onto the back of the camera. Align the mount arm with the top of the camera.

Slide the camera with its mount onto the mounting plate.
Tighten the security screw on the camera mount so that it’s firmly attached to the mounting plate.
Slide the decorative cover back onto the camera mount and click it into place.
Secure the battery cover to the camera with the security screw (optional).

Adjust the camera angle.
Rotate the camera to focus on the area of your choice. Look at Live View in the Ring app to make sure it’s positioned at your desired angle.