Installing Pro Power Kit or jumper cable
You must use the Pro Power Kit with your Wired Doorbell Plus and Pro to make sure that they receive the right amount of power to work correctly. The jumper cable must be connected to bypass your existing chime before you can install Video Doorbell Wired.
Important Notes
- Before removing or attaching wires to your original bell, be sure that the power is turned off at the breaker box.
- If you're uncomfortable with opening up your original bell box or attaching and detaching wires, consult a licensed electrician.
Installation manuals
View the manual for Pro Power Kit V2 and V3. View the manual for jumper cable.Comparing Pro Power Kit V1, V2, and V3
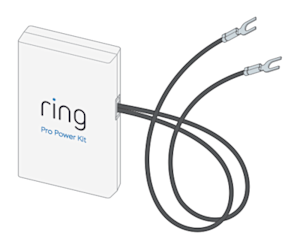
- The Pro Power Kit V2 and V3 both come with solid colored wires that have metal connectors at the ends.
- The Pro Power Kit V1 comes with multi-colored wires and colored cable clamps.
Pro Power Kit V2 and V3 | Pro Power Kit V1 |
|---|---|
 |  |
Installing the Pro Power Kit V2 and V3
Step 1: Remove the cover
Remove the cover on your internal doorbell.
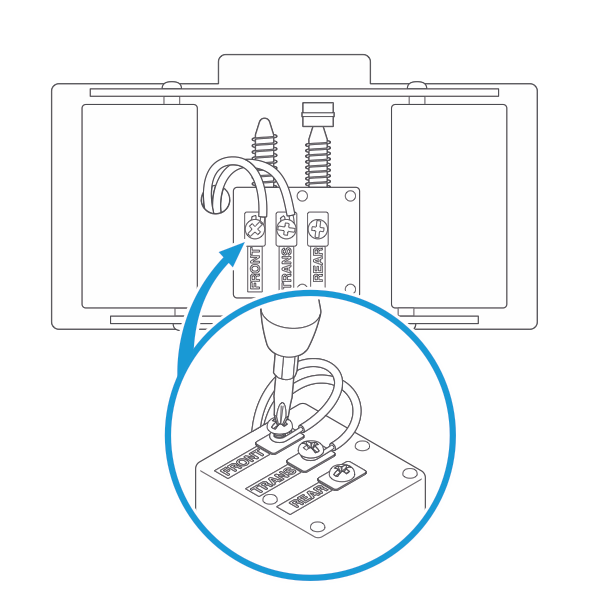
Step 2: Loosen terminal screws
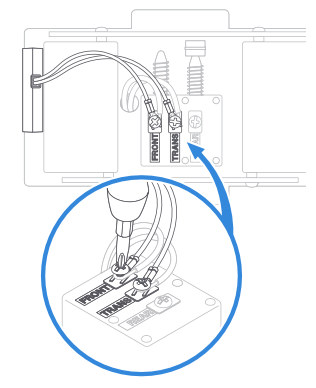
On your internal doorbell, look for wires labelled Front and Trans (Transformer). Loosen the terminal screws on both Front and Trans, keeping the original doorbell wiring in place.
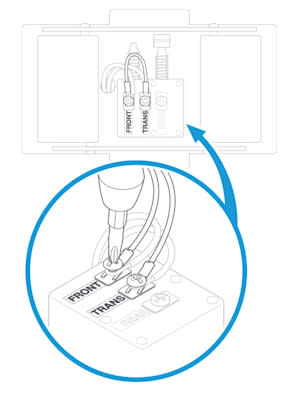
Step 3: Attach wires
Attach Pro Power Kit wires to the Front and Trans terminals next to existing doorbell wires, and tighten terminal screws. Wire orientation between terminals does not matter.
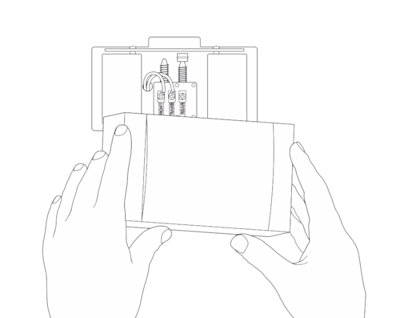
Step 4: Install Pro Power Kit
Place the Pro Power Kit within your internal doorbell, away from any moving parts. Use the adhesive on the back of the Pro Power Kit to fix it in place. Place the cover back on the doorbell and restore power at the breaker. Complete the installation of your Wired Doorbell (Plus and Pro).

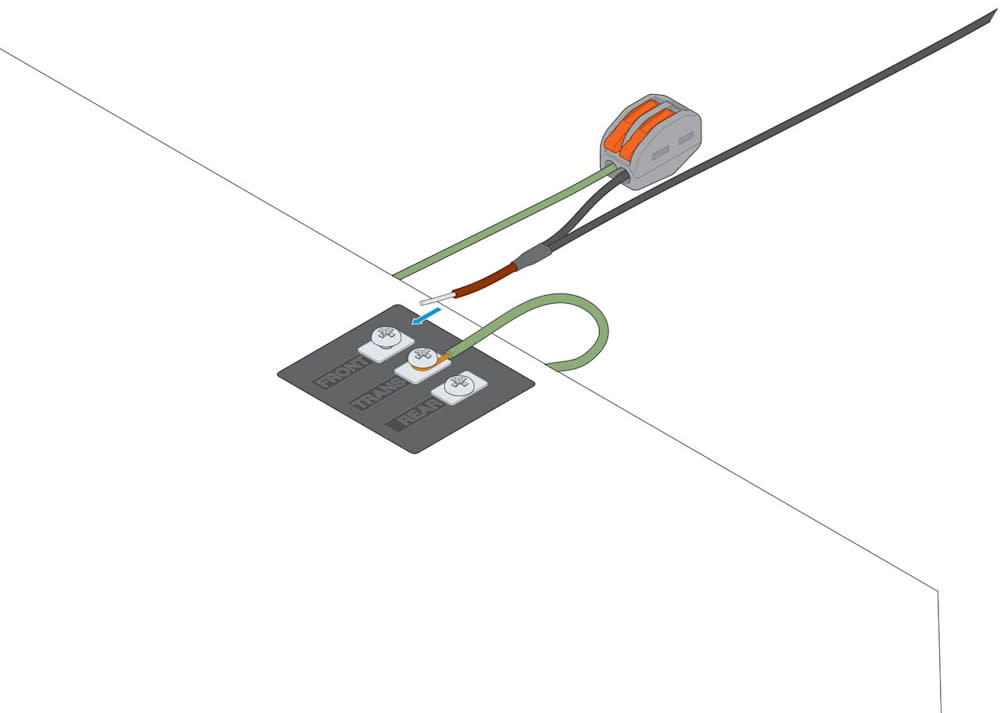
Bypassing your internal doorbell with the Pro Power Kit V2
The Wired Doorbell Pro does not require the Power Pro Kit to sidestep the in-home chime. Remove the wires from the front and trans terminals of the in-home chime and use a wire nut to join them together.
Important: Do not ring your doorbell until you have updated your in-app settings for Chime Type.
Step 1: Remove the cover
Remove the cover on your internal doorbell.
Step 2: Loosen terminal screws
On your internal doorbell, look for wires labelled Front and Trans (Transformer). Loosen the terminal screws on both Front and Trans. Remove the wires from the internal doorbell and straighten the ends.
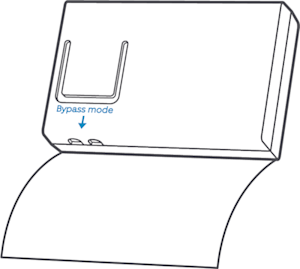
Step 3: Prepare the Pro Power Kit V2
Remove the protective decal from the Pro Power Kit V2 to expose the Bypass Mode wire terminals.
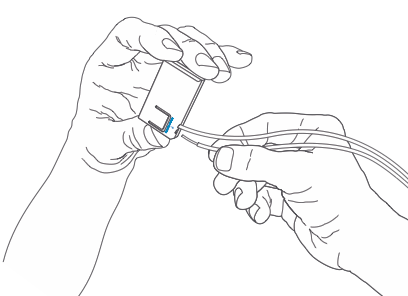
Step 4: Insert wires
Firmly insert the straightened doorbell wires into the Bypass Mode holes on the Pro Power Kit V2 until they are firmly in place.
Step 5: Install Pro Power Kit
Place the Pro Power Kit within your internal doorbell, away from any moving parts. Use the adhesive on the back of the Pro Power Kit to fix it in place. Put the doorbell cover back on, and restore power at the breaker. For first-time setups, complete the installation of your Wired Doorbell Plus.
Step 6: Adjust app settings
In Ring app, navigate to the In-home Chime Settings in your Ring app and set the Doorbell Type to None or No Chime.
Installing the Pro Power Kit V1
Installation manuals
Tap here to download a PDF of the instruction manual for the Pro Power Kit installation.Step 1: Remove the cover
Remove the cover on your internal doorbell.
Step 2: Prepare the Pro Power Kit
Connect the wire harness to the Pro Power Kit.

Step 3: Loosen terminal screws
On your internal doorbell, look for wires labelled Front and Trans (Transformer). Loosen the terminal screw on Front and disconnect the wire.
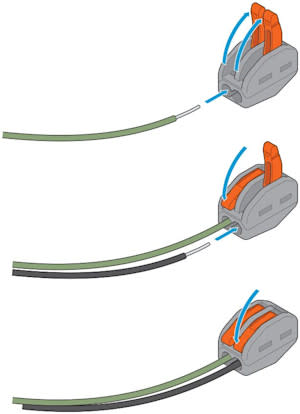
Step 4: Connect wire clips
- Use one of the wire clips to connect theFrontwire to the wire harness. Note that the levers are very sturdy and will not break.
- Connect the end of the wire to theFrontterminal on your internal doorbell.
- Disconnect theTranswire on your internal doorbell. Use the wire clips to connect theTranswire to the wire harness.
- Connect the end of the wire to theTransterminal on your doorbell.
 |  |
Step 5: Install Pro Power Kit
Place the Pro Power Kit within your internal doorbell, away from any moving parts. Put the doorbell cover back on, and turn the power on at the breaker. Complete the installation of your Wired Doorbell Plus.
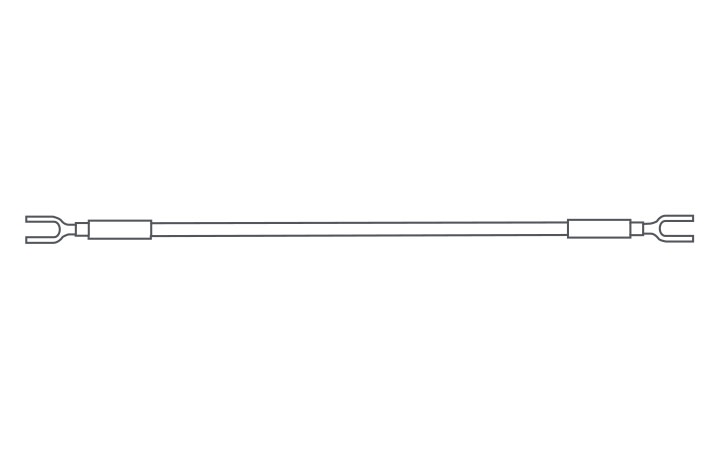
Installing the jumper cable
Step 1: Locate your jumper cable
Look in the parts provided with your Ring doorbell to find the jumper cable.
Step 2: Disconnect the wires
Loosen the screws and remove the cables from your existing chime.
Step 3: Connect the jumper cable
Place the jumper cable connectors where the old wires were, then tighten the screws.