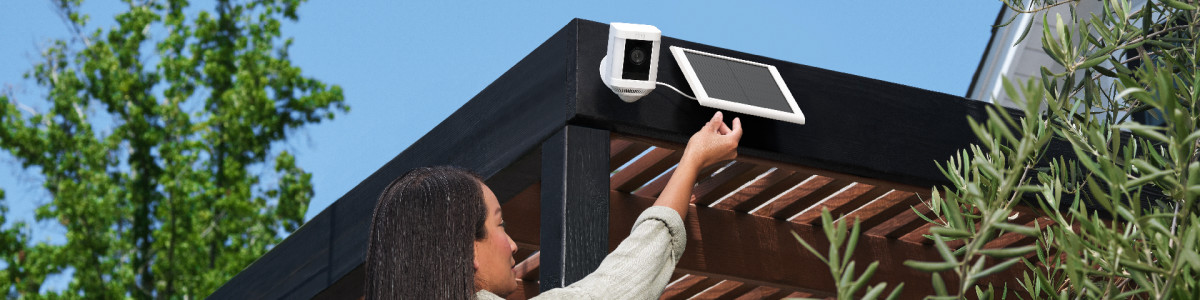
Installing Spotlight Cam (1st Gen) Solar Panel
Physically installing and connecting your Spotlight Cam (1st Gen) Solar Panel to your Spotlight Cam Battery is a simple process.
Tap for information on setting up your Spotlight Cam/Stick Up Cam - Battery in the Ring app.
Attention! The Solar Panel you ordered for your Spotlight Cam may include the Weather Resistant Barrel Connector, which does not match some older installation documentation.
If you purchased a Solar Panel with USB-C connector for a newer Ring device, type: entry-hyperlink id: 3lfNSkdmIjAxlDvCVPKPem it. You can also use a USB-C to Barrel Plug Adapter to make the newer Solar Panels work with older, barrel plug Ring security cameras.
If you purchased a Solar Panel with USB-C connector for a newer Ring device, tap here to learn how to install it. You can also use a USB-C to Barrel Plug Adapter to make the newer Solar Panels work with older, barrel plug Ring security cameras.
Installing the Solar Panel
1. Select your install location.
When selecting your installation spot, be sure to choose a spot that gets reliable sun exposure every day. Spotlight Cam Solar Panel can keep your Spotlight Cam Battery charged with just a few hours of direct sunlight per day.
2. Line up your Spotlight Cam Solar Panel.
To properly line up your Spotlight Cam Solar Panel:
- Using the Solar Panel mounting arm as a template, mark the screw holes on your chosen surface with a pencil.
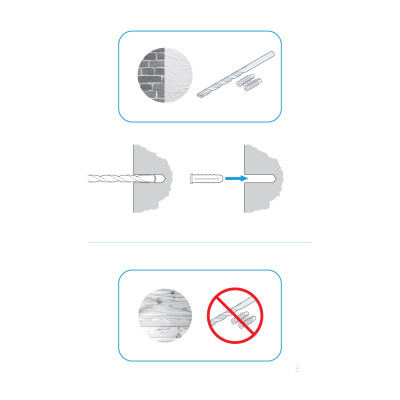
3. Drill holes.
Optional: Use a drill to drill holes where you marked the position of the mounting holes.
- If you are mounting the Spotlight Cam Solar Panel on brick, concrete, or stucco, put the included plastic anchors into the holes. You may need to use a hammer to secure the anchors.
- If you are mounting the bracket on wood or vinyl, just use the included screws.
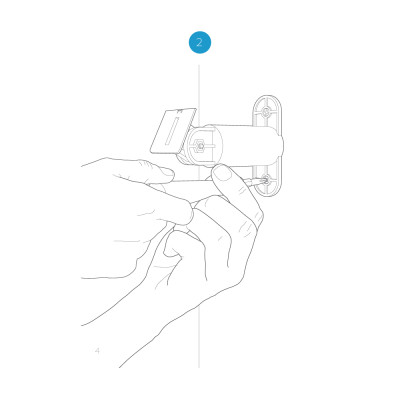
4. Put up the mounting arm.
Secure the mounting arm to the wall with the included screws. Tighten until snug.
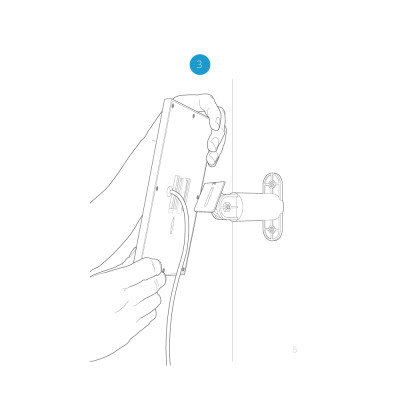
5. Attach the Solar Panel to the mount.
Slide the solar panel onto the mounting arm. Make sure it's seated securely.
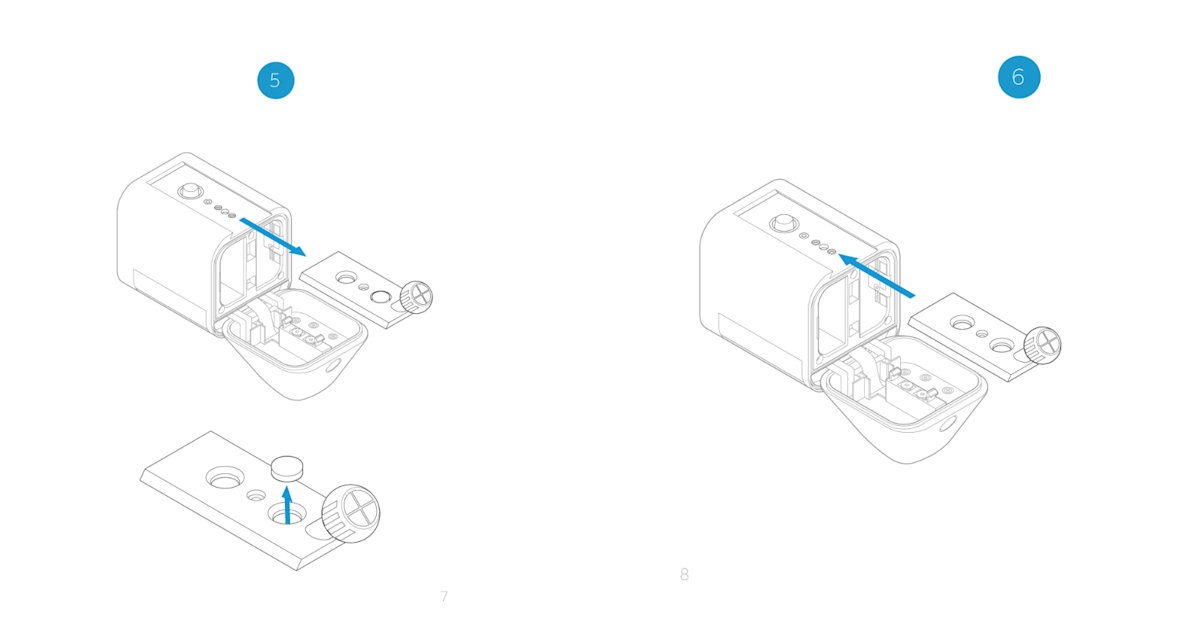
6. Pop out the weatherproofing plug.
You will need to remove the mounting plate on your Spotlight Cam, pop out the weatherproofing plug and then replace it.
- Press the button on the back of the Spotlight Cam to open the battery compartment. Then, slide the mounting plate out of its slot.
- On the mounting plate, pop the rubber weatherproofing plug out of its hole.
- Slide the mounting plate back into its slot on the back of the Spotlight Cam until it clicks into place.
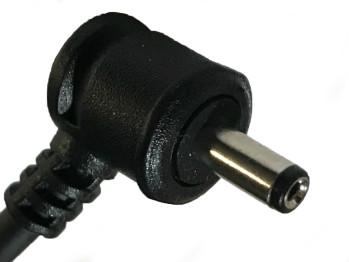
7. Plug the Solar Panel charging cable into the Spotlight Cam.
- Route the charging cable from your Solar Panel into the power connector on Spotlight Cam.
- Remove the center plug.
- Plug the snap ring barrel charging cable into the power connector on Spotlight Cam.
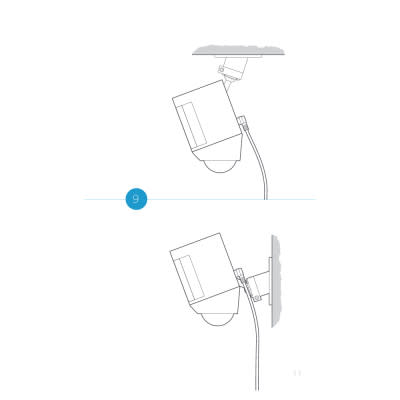
8. Mount the Spotlight Cam.
Insert Spotlight Cam into the mounting bracket, set the desired angle, then tighten the adjustment screw.