
How to install your Ring Video Doorbell Pro with a hardwired transformer
Safety and compliance information for this product
1. Install transformer
For your safety, only use an existing doorbell transformer within the range specified below or compatible Ring accessories to power your device.
For connecting to an existing doorbell system:
- Hardwired transformer (16 to 24 VAC, 50/60Hz, 10VA to 40VA)
Ring accessories are sold separately and may include:
- DIN Rail Transformer (24Vdc, 420mA)
- Plug-In Adapter (24Vdc, 500mA)
Not compatible with: third-party DC adapters, halogen transformers and garden-lighting transformers. Using incompatible power sources can damage your device and cause electric shock.
If you need help with this process, you should consult a qualified electrician.
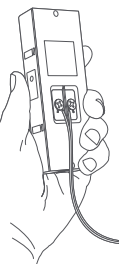
If you use a 24 VAC doorbell transformer, you’ll also need to bypass your existing doorbell using the Pro Power Kit V2 (pictured below), as most doorbells aren’t rated for use with a 24 VAC transformer.

1.1 Turn off power at the fusebox
Since you’ll be working with high-voltage electricity, first turn off the main power switch on your fusebox or consumer unit.
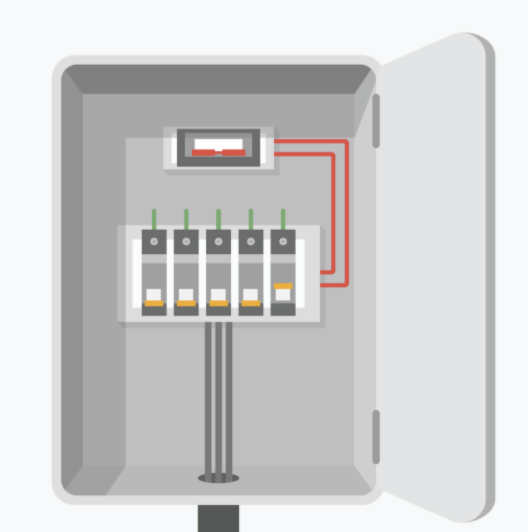
1.2 Locate your existing doorbell transformer
Your transformer is most likely in your fusebox or consumer unit. If not, look in other places where electrical components are installed. It may also be inside your existing doorbell. You can often get a clue to the location of the transformer by looking under the cover of your internal doorbell.
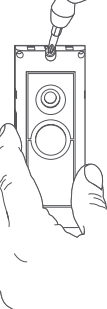
1.3 Replace your transformer
Disconnect the 4 wires from your existing transformer, and remove it from your fusebox or other install location. Connect these 4 wires to your new transformer, making sure not to swap the mains and secondary wires. Insert the wire ends into each clamp-down terminal, and tighten each connection with a small Phillips screwdriver. Make sure that each wire is securely clamped for a solid connection.
1.4 (Optional) If required, use an Enclosure for DIN Rail Transformer.
If you need an enclosure for your transformer, Ring’s Enclosure for DIN Rail Transformer is specifically designed to house your DIN Rail Transformer. It blends into the background while being large enough to cover the footprint of your existing chime.
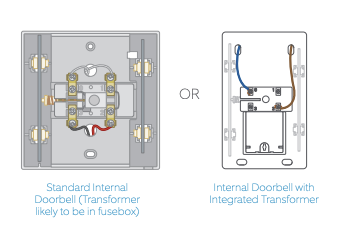
2. Bypass your internal doorbell
Locate your internal doorbell, and remove the cover. Study the connections on your doorbell. The trick here is to identify the wires that are powering your doorbell. If your doorbell is different than the one pictured here, consult your doorbell’s instruction manual for guidance.
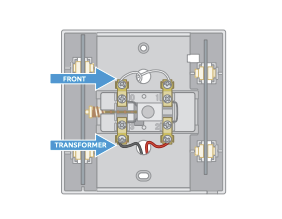
2.1 Identify your doorbell’s power source
In this example. the wires on the left (0 and 3) are the wires that power the doorbell’s physical mechanism (or in electrical terms, its solenoid or coil), making it produce sound. If you look closely, you can see thin wires, running from terminals 0 and 3 to the hidden solenoid. By contrast, terminals 1 and 2 are connected directly to each other via a thin wire (meaning they aren’t providing power to your doorbell).
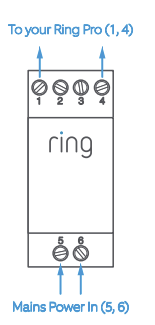
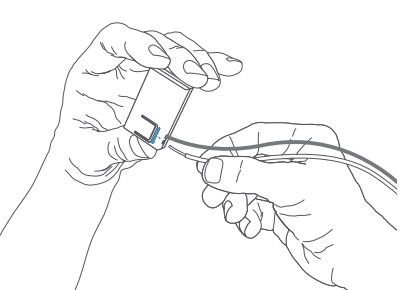
2.2 Connect the Pro Power Kit
The Pro Power Kit V2 is designed to bypass your existing doorbell. Even if you are not bypassing an existing doorbell, connecting the Pro Power Kit is a required step with AC transformers, in order to protect your new doorbell and transformer.
If you're using the Ring DIN Rail Transformer, you do not need to use a Pro Power Kit.
Remove the wires that run through your doorbell’s solenoid (again, 0 and 3 in this example), and straighten the ends. Then, firmly insert the wires into the Bypass Mode holes on Pro Power Kit. It doesn’t matter which wire goes to each hole.
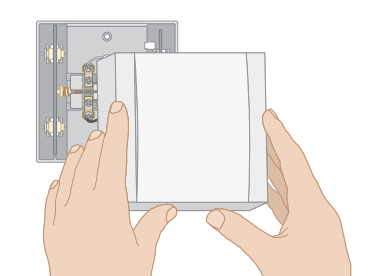
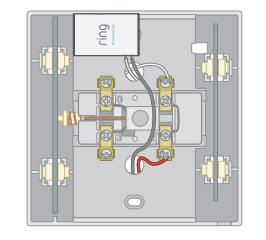
2.3 Replace the cover
You’ve now replaced your transformer and bypassed your existing doorbell. A successful bypass should look something like the image below. Now you’re ready to install your Ring Video Doorbell Pro!
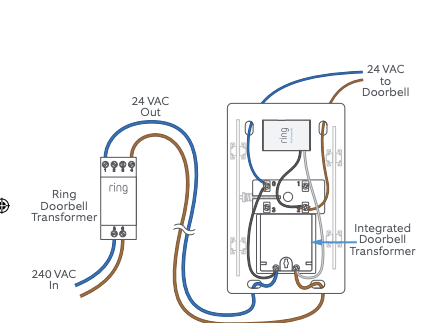
2.4 Is your doorbell transformer inside your internal doorbell?
In some cases, your doorbell transformer may integrated into your internal doorbell. In this configuration, mains power runs from your fusebox directly to the transformer in your doorbell. To replace this type of transformer, make sure that your main power switch is off, then install the Ring transformer in your fusebox. Next, connect mains power to its 240 volt inputs.
Then, disconnect the mains wires that currently run to your doorbell from the fusebox, and connect them to the 24 volt outputs on the Ring DIN Rail Transformer. This repurposes those mains wires to carry 24 volt power to your doorbell. The final install, including the Pro Power Kit, should look similar to this diagram.
3. Install your Video Doorbell Pro
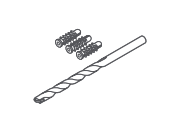
Screwdriver - Use the Phillips end for the mounting screws and star-shaped end for the security screw.

Drill bit and anchors - Use a 6mm drill bit with a power drill to drill holes for the (optional) anchors if installing on concrete, stucco, or brick.
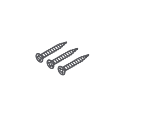
Mounting screws - Use two to mount your Ring Doorbell. Use the longer screws if you’re installing with the optional Retrofit Kit.
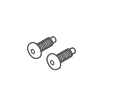
Security screws - Use one to secure the faceplate.
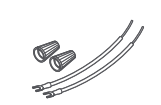
Wire extenders and wire nuts - Use to extend existing doorbell wires (if needed).
Retrofit Kit - Use if upgrading from the original Ring Video Doorbell, or as additional trim when upgrading from a conventional doorbell.
3.1 Uninstall your existing doorbell
Unscrew your existing doorbell from the wall and disconnect its wires.
3.2 Mark the holes
Using your Ring Doorbell as a template, mark the location of the two mounting holes on your wall.
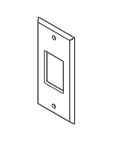
3.3 Removing the faceplate
To access the mounting holes, first remove the faceplate, like this.
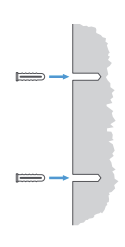
3.4 Install anchors (optional)
If you’re installing on a hard surface such as concrete, stucco, or brick, use the provided bit to drill two holes in your wall, and push the provided anchors into these holes. If you’re installing on wood or siding, you can skip this step
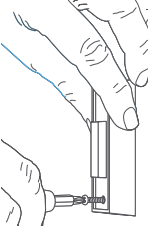
3.5 Connect the wires
Attach your existing doorbell wires to the terminals on the rear of your Video Doorbell, and tighten the terminal screws with the Ring screwdriver.
If your doorbell wires are too short, use the wire extenders and wire nuts to extend them.
3.6 Mount your Ring doorbell
Feed the wiring back into the wall, and mount your doorbell with the included mounting screws.
3.7 Restore power at the breaker
You’re almost there! After turning power back on, it’s time to set up your doorbell in the Ring app.
4. Finish setting up your Video Doorbell Pro
The Ring app connects your Ring Doorbell to your mobile device running iOS or Android, making sure you’re always home. Search for “Ring” in one of the app stores above, or to automatically find the correct app, visit ring.com/app.
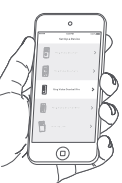
4.1 Follow the in-app setup process
Open the Ring app and tap Set Up Device to begin the setup process. Select Ring Video Doorbell Pro from the list and follow the in-app instructions.
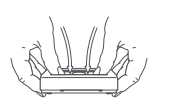
4.2 Install the faceplate
Now it’s time for the finishing touch. Attach one of the faceplates to your Ring Doorbell Pro. Then secure it with a security screw, using the star-shaped end of the provided screwdriver bit.

4.3 Connect a Ring Chime or Ring Chime Pro (optional)
Finally, because you'll most likely have to bypass your existing doorbell in order to power Ring Video Doorbell Pro, your existing doorbell will no longer produce sound.
You can connect an Alexa-enabled device, Ring Chime or Ring Chime Pro to your doorbell, if you'd still like an internal chime as well as notifications through your phone.
The Ring Chime plugs into any standard power socket and works with your Ring Video Doorbell Pro to let you know when you have a visitor even if your phone is in the other room.
Read more about using Alexa-enabled devices with your Video Doorbell here.